반응형
개발자들이 조심해야 할 함정들
https://qouteall.fun/qouteall-blog/2025/Traps%20to%20Developers#summarization-of-traps
Traps to Developers | qouteall notes
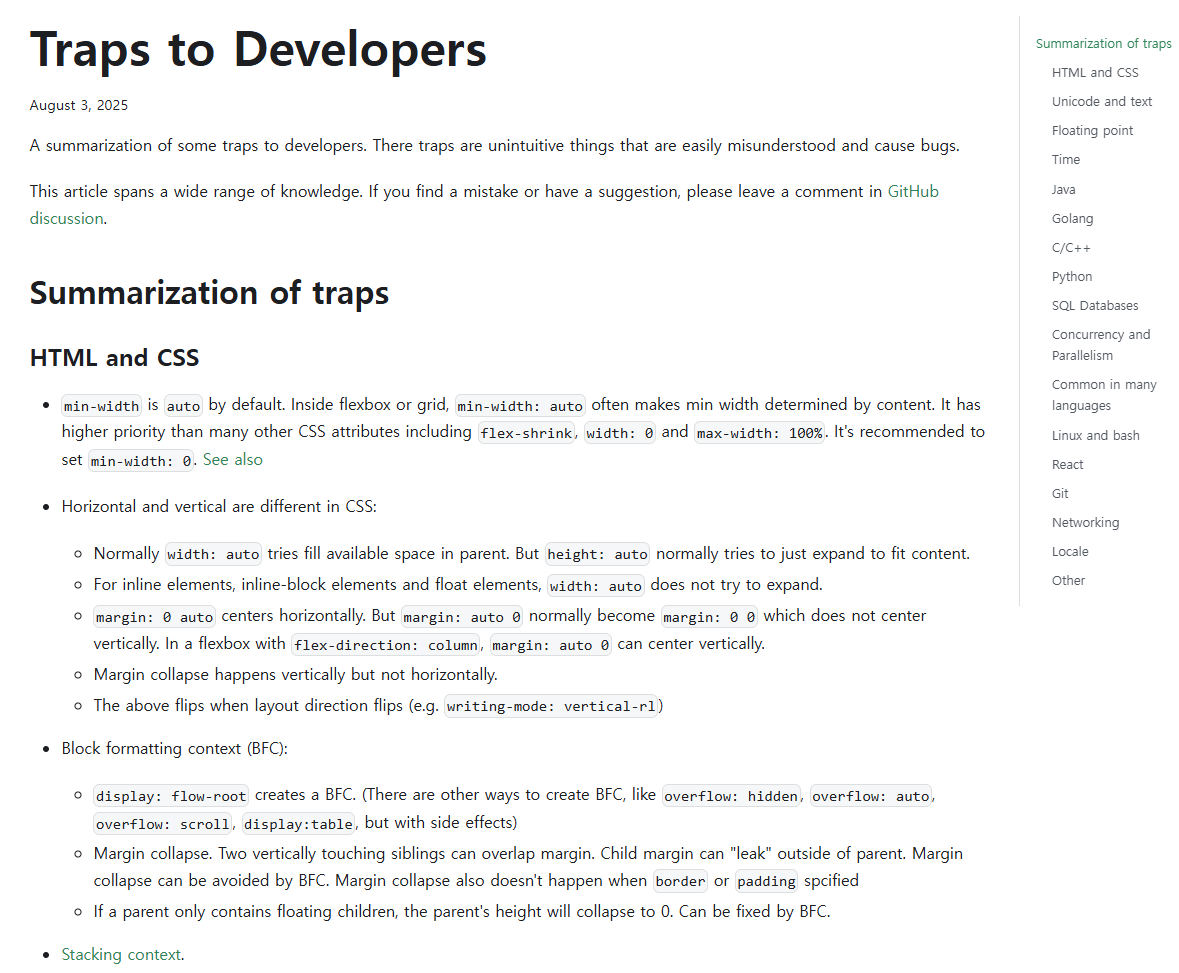
A summarization of some traps to developers. There traps are unintuitive things that are easily misunderstood and cause bugs.
qouteall.fun
- 개발자들이 흔히 빠지는 직관적이지 않은 함정을 정리하여, 발생하기 쉬운 버그의 원인을 소개함
- HTML, CSS, Unicode/텍스트 인코딩, 부동소수점, 시간 등 다양한 기술에서 자주 발생하는 문제점들을 다룸
- 각각의 언어와 프레임워크에서 문법 및 동작의 미묘한 차이로 인해 오해나 오류가 생길 수 있음을 강조
- 동시성, 네트워킹, 데이터베이스 등 백엔드 핵심 영역에서 실제 운영 환경에서 발생할 수 있는 함정들을 예시로 설명함
- 다양한 예제와 참고 링크를 통해 문제 상황과 해결법, 그리고 예기치 않은 동작 개선점을 안내함
HTML과 CSS
- Flexbox/Grid에서 min-width 기본값
- min-width는 기본적으로 auto
- min-width: auto는 콘텐츠 크기에 의해 결정되며, flex-shrink, overflow: hidden, width: 0, max-width: 100%보다 우선 적용
- 권장: min-width: 0 명시
- CSS에서 가로와 세로의 차이
- width: auto는 부모 공간 채우기를 시도, height: auto는 콘텐츠에 맞춤
- inline, inline-block, float 요소의 width: auto는 확장하지 않음
- margin: 0 auto는 가로 중앙 정렬, margin: auto 0은 세로 중앙 정렬 불가 (단, flex-direction: column에서는 세로 중앙 가능)
- 마진 병합은 세로에서만 발생
- writing-mode: vertical-rl 등 레이아웃 방향이 바뀌면 동작도 반전
- Block Formatting Context (BFC)
- display: flow-root로 BFC 생성 (그 외 overflow: hidden/auto/scroll, display: table 등도 가능하나 부작용 존재)
- 세로 인접 형제 마진이 겹치거나, 자식 마진이 부모 밖으로 새는 현상은 BFC로 방지 가능
- 부모가 float 자식만 포함하면 높이가 0으로 무너짐 → BFC로 수정 가능
- border나 padding이 있으면 마진 병합 발생하지 않음
- Stacking Context
- 새로운 stacking context를 만드는 조건
- transform, filter, perspective, mask, opacity 등 렌더링 속성
- position: fixed 또는 sticky
- z-index 지정 + absolute/relative 위치 지정
- z-index 지정 + flexbox/grid 내부 요소
- isolation: isolate
- 특징
- z-index는 stacking context 내부에서만 적용
- position: absolute/fixed 좌표는 가장 가까운 positioned 조상 기준
- sticky는 stacking context를 넘어서 동작하지 않음
- overflow: visible도 stacking context에 의해 잘림
- background-attachment: fixed는 stacking context 기준으로 배치
- 새로운 stacking context를 만드는 조건
- 뷰포트 단위
- 모바일 브라우저에서 주소창/네비게이션바 스크롤 시 화면에서 사라지면 100vh 값이 달라짐
- 최신 해결책: 100dvh 사용
- Absolute Position 기준
- position: absolute는 부모가 아닌, 가장 가까운 relative/absolute 또는 stacking context 조상을 기준
- Blur 동작
- backdrop-filter: blur는 주변 요소를 고려하지 않음
- Float 무효화
- 부모가 flex 또는 grid면 자식의 float는 효과 없음
- 퍼센트 단위 width/height
- 부모의 크기가 사전에 결정되지 않으면 작동하지 않음 (순환 참조 회피 목적)
- Inline 요소 특성
- display: inline은 width, height, margin-top, margin-bottom 무시
- Whitespace 처리
- 기본적으로 HTML의 줄바꿈은 공백으로 취급, 연속 공백은 하나로 축소
- <pre>는 공백 축소 방지하지만 시작/끝 부분 동작 특이
- 대부분 콘텐츠 시작/끝 공백은 무시되나 <a>는 예외
- inline-block 사이의 공백/줄바꿈은 실제 간격으로 표시됨 (flex/grid에서는 발생 안 함)
- text-align
- 텍스트 및 inline 요소 정렬에는 적용되지만 block 요소 정렬에는 적용되지 않음
- box-sizing
- 기본값은 content-box → padding/border 포함 안 됨
- width: 100% + padding 설정 시 부모 영역 넘침 가능
- 해결: box-sizing: border-box
- Cumulative Layout Shift
- <img>에 width와 height 속성을 지정하지 않으면 이미지 로딩 지연으로 레이아웃 흔들림 발생
- 권장: 속성 지정으로 CLS 방지
- Chrome에서 파일 다운로드 네트워크 요청
- DevTools 네트워크 패널에 표시되지 않음 (다른 탭으로 처리됨)
- 분석 필요 시 chrome://net-export/ 사용
- HTML 내 JavaScript 파싱 문제
- <script>console.log('</script>')</script> 같은 경우 첫 </script>를 종료 태그로 인식
- 참고: Safe JSON in script tags
Unicode와 텍스트 인코딩
- 코드 포인트와 그래프림 클러스터
- 그래프림 클러스터는 GUI에서의 "문자 단위"
- 가시적 ASCII 문자는 코드 포인트 1개 = 그래프림 클러스터 1개
- 이모지는 여러 코드 포인트로 구성된 하나의 그래프림 클러스터일 수 있음
- UTF-8에서 코드 포인트는 1~4바이트, 바이트 수와 코드 포인트 수는 일치하지 않음
- UTF-16에서 코드 포인트는 2바이트 또는 4바이트(서로게이트 페어)
- 표준은 클러스터 내 코드 포인트 수 제한을 두지 않으나, 구현에서는 성능상 제한 존재
- 언어별 문자열 동작 차이
- Rust: 내부 문자열 UTF-8 사용, len()은 바이트 수, 직접 인덱싱 불가, chars().count()는 코드 포인트 수, UTF-8 유효성 엄격 검증
- Golang: 문자열은 사실상 바이트 배열, 길이와 인덱싱은 바이트 단위, 주로 UTF-8 사용
- Java, C#, JS: UTF-16 기반, 2바이트 단위로 길이 측정, 인덱싱도 2바이트 단위, 서로게이트 페어 존재
- Python: len()은 코드 포인트 수 반환, 인덱싱은 코드 포인트 하나를 포함하는 문자열 반환
- C++: std::string은 인코딩 제약 없음, 바이트 벡터처럼 동작, 길이/인덱싱은 바이트 단위
- 언급된 언어 중 그래프림 클러스터 단위로 길이/인덱싱하는 언어는 없음
- BOM (Byte Order Mark)
- 일부 텍스트 파일은 BOM을 가짐, 예: EF BB BF → UTF-8 인코딩 표시
- 주로 Windows에서 사용, 비-Windows 소프트웨어는 BOM 처리 못할 수 있음
- 기타 주의사항
- 바이너리 데이터를 문자열로 변환 시, 잘못된 부분은 � (U+FFFD)로 대체됨
- Confusable characters 존재 (서로 비슷해 보이는 문자)
- 정규화(Normalization): 예) é는 U+00E9(단일 코드 포인트) 또는 U+0065+U+0301(두 코드 포인트)로 표현 가능
- Zero-width characters 및 Invisible characters 존재
- 줄바꿈 차이: Windows는 CRLF \r\n, Linux/MacOS는 LF \n
- 한자 통합(Han unification): 언어별로 모양이 조금 다른 문자가 동일 코드 포인트 사용
- 폰트가 언어별 변형을 포함하여 적절히 렌더링
- 국제화 시 올바른 폰트 변형 선택 필요
부동소수점 (Floating point)
- NaN 특성
- NaN은 자기 자신을 포함한 어떤 값과도 같지 않음 (NaN == NaN은 항상 false)
- NaN != NaN은 항상 true
- NaN을 포함한 연산 결과는 대부분 NaN으로 전파됨
- 특수한 값
- +Inf와 -Inf 존재, NaN과는 다름
- -0.0은 +0.0과 구분되는 값
- 비교 연산에서는 동일하지만, 일부 계산에서는 다르게 동작
- 예: 1.0 / +0.0 == +Inf, 1.0 / -0.0 == -Inf
- JSON과의 호환성
- JSON 표준은 NaN과 Inf를 허용하지 않음
- JS JSON.stringify는 NaN, Inf를 null로 변환
- Python json.dumps(...)는 NaN, Infinity를 그대로 출력 (표준 위반)
- allow_nan=False 옵션 시 NaN/Inf가 있으면 ValueError 발생
- Golang json.Marshal은 NaN/Inf 존재 시 에러 반환
- JSON 표준은 NaN과 Inf를 허용하지 않음
- 정밀도 문제
- 부동소수점 직접 비교는 실패 가능 → abs(a - b) < ε 형태 권장
- JS는 모든 숫자를 부동소수점으로 처리
- 안전한 정수 범위는 -(2^53 - 1) ~ 2^53 - 1
- 이 범위를 벗어나면 정수 표현이 부정확
- 큰 정수에는 BigInt 사용 권장
- JSON에 안전 범위를 넘어선 정수가 포함되면 JSON.parse 결과 값은 부정확할 수 있음
- 밀리초 단위 타임스탬프는 287,396년까지 안전, 나노초 단위는 문제 발생
- 연산 법칙 비적용
- 연산 순서에 따라 정밀도 손실로 인해 결합법칙, 분배법칙이 엄밀히 성립하지 않음
- 병렬 연산(행렬 곱셈, 합계 등)은 비결정적 결과를 만들 수 있음
- 성능
- 나눗셈은 곱셈보다 훨씬 느림
- 동일한 수로 여러 번 나눌 때는 역수를 먼저 구해 곱하는 방식으로 최적화 가능
- 하드웨어에 따른 차이
- FMA(Fused Multiply-Add) 지원 여부: 일부 하드웨어는 더 높은 정밀도로 중간 계산
- Subnormal range 처리: 최신 하드웨어는 지원하지만 일부 구형은 0으로 처리
- 반올림 모드 차이
- RNTE(가장 가까운 짝수로 반올림), RTZ(0으로 절단) 등 존재
- x86/ARM은 스레드 로컬 mutable 상태로 설정 가능
- GPU는 명령어 단위로 반올림 모드가 다름
- 삼각함수, 로그 등 수학 함수 동작 차이
- x86은 레거시 80비트 FPU와 per-core rounding mode 존재 → 사용 비권장
- 이 외에도 다양한 요인으로 하드웨어별 부동소수점 결과가 달라질 수 있음
- 정밀도 향상 방법
- 계산 그래프를 얕게 구성 (곱셈 연속 구조 줄이기)
- 중간 값이 매우 크거나 매우 작은 경우 피하기
- FMA 같은 하드웨어 연산 활용
시간 (Time)
- 윤초(Leap second)
- Unix 타임스탬프는 윤초를 무시
- 윤초 발생 시 주변 구간에서 시간이 늘어나거나 줄어듦(Leap smear)
- 시간대(Time zone)
- UTC 및 Unix 타임스탬프는 전 세계 공통
- 사람이 읽는 시간은 지역별 시간대에 의존
- DB에는 타임스탬프를 저장하고 UI에서 변환하는 방식 권장
- 서머타임(DST)
- 일부 지역에서는 여름철에 1시간 시계 조정
- NTP 동기화
- 동기화 과정에서 시간이 "뒤로 가는" 상황 발생 가능
- 서버 시간대 설정
- 서버는 UTC로 설정 권장
- 분산 시스템에서 노드별 시간대가 다르면 문제 발생
- 시스템 시간대 변경 후 DB 재설정 또는 재시작 필요
- 하드웨어 시계 vs 시스템 시계
- 하드웨어 시계는 시간대 개념 없음
- Linux: 하드웨어 시계를 UTC로 처리
- Windows: 하드웨어 시계를 로컬 시간으로 처리
Java
- ==는 객체 참조 비교, 객체 내용 비교는 .equals 사용 필요
- equals와 hashcode를 오버라이드하지 않으면 map/set에서 객체 동일성을 참조 기반으로 판단
- map의 key 객체나 set 원소 객체의 내용을 변경하면 컨테이너 동작이 깨짐
- List<T> 반환 메서드는 경우에 따라 mutable ArrayList 또는 immutable Collections.emptyList() 반환, 후자 수정 시 UnsupportedOperationException 발생
- Optional<T>를 반환하는 메서드가 null을 리턴하는 경우 존재 (권장되지 않음)
- finally 블록에서 return 시, try 또는 catch에서 발생한 예외가 무시되고 finally 반환 값이 적용됨
- interrupt 무시하는 라이브러리 존재, IO 포함한 클래스 초기화 과정이 interrupt로 깨질 수 있음
- thread pool에서 .submit()으로 전달한 task의 예외는 기본적으로 로그에 출력되지 않고 future로만 확인 가능, future 무시하면 예외 확인 불가
- scheduleAtFixedRate 작업은 예외 발생 시 조용히 중단됨
- 숫자 리터럴이 0으로 시작하면 8진수 처리 (0123 → 83)
- 디버거는 지역 변수의 .toString()을 호출, 일부 클래스의 toString()에 부작용이 있어 디버깅 시 코드 동작이 달라질 수 있음 (IDE에서 비활성화 가능)
Golang
- append()는 capacity 여유 시 메모리 재사용, subslice에 append 시 부모 메모리까지 덮어쓸 수 있음
- defer는 함수 리턴 시 실행, 블록 스코프 종료 시가 아님
- defer는 mutable 변수 캡처
- nil 관련
- nil slice와 empty slice는 다름
- string은 nil 불가, 빈 문자열만 존재
- nil map은 읽기는 가능하지만 쓰기는 불가
- interface nil 특이 동작: data pointer가 null이지만 type info가 null이 아니면 nil과 같지 않음
- Dead wait: Go에서 실제 동시성 버그 사례 존재
- Timeout 종류 다양, net/http에서 상세히 다룸
C/C++
- std::vector 원소 포인터 저장 후 vector가 grow되면 재할당 발생, 포인터 무효화
- 리터럴 문자열로 생성된 std::string은 임시 객체일 수 있음, c_str() 호출 시 위험
- 반복 중 컨테이너 수정 시 iterator 무효화 발생
- std::remove는 실제 삭제가 아닌 원소 재배열, 삭제는 erase 필요
- 숫자 리터럴이 0으로 시작하면 8진수 처리 (0123 → 83)
- Undefined behavior (UB): 최적화 과정에서 UB는 자유롭게 바뀔 수 있어 의존 시 위험
- 초기화되지 않은 메모리 접근 UB
- char*를 struct 포인터로 변환 시 객체 수명 시작 전 접근으로 UB, memcpy로 초기화 권장
- 잘못된 메모리 접근 (null 포인터 등) UB
- 정수 overflow/underflow UB (unsigned는 0 아래로 underflow 가능)
- Aliasing: 서로 다른 타입 포인터가 동일 메모리 참조 시 strict aliasing rule에 의해 UB 발생
- 예외: 1) 상속관계 타입 2) char*, unsigned char*, std::byte* 변환 (역변환은 적용 안 됨)
- 강제 변환은 memcpy 또는 std::bit_cast 권장
- Unaligned memory 접근 UB
- 메모리 Alignment
- 64비트 정수는 주소가 8로 나누어 떨어져야 함
- ARM에서 unaligned 접근은 crash 가능
- 바이트 버퍼를 struct로 직접 해석 시 alignment 문제 발생
- alignment는 struct padding을 만들어 메모리 낭비 가능
- 일부 SIMD 명령어(AVX 등)는 정렬된 데이터만 처리 가능, 보통 32바이트 alignment 필요
Python
- 함수 기본 인자는 호출 시마다 새로 생성되지 않고 최초 값이 그대로 저장됨
SQL Databases
- Null 처리
- x = null은 동작하지 않고 x is null을 사용해야 함
- Null은 자기 자신과 같지 않음 (NaN과 유사)
- Unique index는 Null 중복 허용 (단, Microsoft SQL Server는 예외)
- select distinct에서 Null 처리 방식은 DB마다 다름
- count(x)와 count(distinct x)는 Null 값이 있는 행을 무시
- 일반 동작
- 날짜 암묵 변환은 timezone 의존적일 수 있음
- 복잡한 join + distinct는 중첩 쿼리보다 느릴 수 있음
- MySQL(InnoDB)에서 string 필드가 utf8mb4가 아니면 4-byte UTF-8 문자 삽입 시 오류 발생
- MySQL(InnoDB)은 기본적으로 대소문자 구분 없음
- MySQL(InnoDB)은 암묵적 변환 허용: select '123abc' + 1; → 124
- MySQL(InnoDB) gap lock은 deadlock 유발 가능
- MySQL(InnoDB)에서는 group by와 select 컬럼 불일치 시 비결정적 결과 반환
- SQLite에서는 strict가 아니면 필드 타입이 크게 의미 없음
- Foreign key는 암묵적 lock을 발생시켜 deadlock을 유발할 수 있음
- Locking은 DB별로 repeatable read isolation을 깨뜨릴 수 있음
- 분산 SQL DB는 locking 미지원이거나 특이한 동작 가능 (DB별 상이)
- 성능/운영
- N+1 query 문제는 각 쿼리가 빠르기 때문에 slow query log에 나타나지 않음
- 장기 실행 트랜잭션은 lock 문제 등 유발 → 트랜잭션은 빠르게 끝내는 것이 권장됨
- 전체 테이블 lock 사례
- MySQL 8.0+에서는 unique index/foreign key 추가 시 대부분 동시 처리 가능
- 구버전 MySQL은 전체 테이블 lock 발생 가능
- mysqldump에 --single-transaction 옵션 없으면 전체 테이블 read lock
- PostgreSQL에서 create unique index나 alter table ... add foreign key는 전체 테이블 read lock 유발
- 회피: create unique index concurrently 사용
- foreign key는 ... not valid 후 validate constraint 방식 사용
- Range 쿼리
- 겹치지 않는 범위:
- 단순 조건 p >= start and p <= end는 비효율적 (복합 인덱스 있어도)
- 효율적 방식:
(start 컬럼 인덱스만 필요)select * from (select ... from ranges where start <= p order by start desc limit 1) where end >= p
- 겹칠 수 있는 범위:
- 일반 B-tree 인덱스로는 비효율적
- MySQL은 spatial index, PostgreSQL은 GiST 사용 권장
- 겹치지 않는 범위:
Concurrency and Parallelism
- volatile
- volatile은 lock을 대체할 수 없으며 atomicity 제공 안 함
- lock으로 보호된 데이터는 volatile 필요 없음 (lock이 memory order 보장)
- C/C++: volatile은 일부 최적화만 방지, memory barrier 추가 안 됨
- Java: volatile 접근은 sequentially-consistent ordering 제공 (필요 시 JVM이 memory barrier 삽입)
- C#: volatile 접근은 release-acquire ordering 제공 (필요 시 CLR이 memory barrier 삽입)
- 메모리 읽기/쓰기 재정렬 관련 잘못된 최적화 방지 가능
- TOCTOU (Time-of-check to time-of-use) 문제
- SQL DB에서 응용 계층 제약 조건 처리
- 단순 unique index로 표현 불가한 제약(예: 두 테이블 간 유니크, 조건부 유니크, 기간 내 유니크)을 애플리케이션에서 강제하는 경우:
- MySQL(InnoDB): repeatable read 레벨에서 select ... for update 후 insert, 그리고 유니크 컬럼에 인덱스가 있으면 gap lock 덕분에 유효 (단, gap lock은 고부하 시 deadlock 유발 가능 → deadlock detection 및 retry 필요)
- PostgreSQL: repeatable read 레벨에서 동일 로직은 동시성 상황에서 불충분 (write skew 문제)
- 해결책:
- serializable isolation level 사용
- 애플리케이션 대신 DB 제약 사용
- 조건부 유니크 → partial unique index
- 두 테이블 간 유니크 → 별도 테이블에 중복 데이터 삽입 후 unique index
- 기간 배타성 → range type + exclude constraint
- 해결책:
- 단순 unique index로 표현 불가한 제약(예: 두 테이블 간 유니크, 조건부 유니크, 기간 내 유니크)을 애플리케이션에서 강제하는 경우:
- Atomic reference counting
- Arc, shared_ptr와 같이 많은 스레드가 동일 카운터를 자주 변경하면 성능 저하
- Read-write lock
- 일부 구현은 read lock에서 write lock으로 업그레이드 지원하지 않음
- read lock 보유 상태에서 write lock 시도 시 deadlock 발생 가능
Common in many languages
- Null/None/nil 체크 누락이 흔한 오류 원인
- 반복문 중 컨테이너 수정 시 단일 스레드 데이터 경쟁 발생 가능
- 가변 데이터 공유 실수: 예) Python에서 [[0] * 10] * 10은 올바른 2D 배열 생성 아님
- (low + high) / 2는 overflow 가능 → 안전한 방식은 low + (high - low) / 2
- 단락 평가(short circuit): a() || b()는 a가 true면 b 실행 안 됨, a() && b()는 a가 false면 b 실행 안 됨
- 프로파일러 기본값은 CPU time만 포함 → DB 대기 등은 flamegraph에 나타나지 않아 오해 유발
- 정규 표현식 dialect가 언어마다 다름 → JS에서 동작하는 정규식이 Java에서 동작 안 할 수 있음
Linux and bash
- 디렉터리 이동 후 pwd는 원래 경로, 실제 경로는 pwd -P
- cmd > file 2>&1 → stdout+stderr 모두 파일, cmd 2>&1 > file → stdout만 파일, stderr는 그대로
- 파일 이름은 대소문자 구분 (Windows와 다름)
- 실행 파일은 capability 시스템 존재 (getcap으로 확인)
- Unset 변수 위험: DIR unset이면 rm -rf $DIR/ → rm -rf / 실행 위험 → set -u로 방지 가능
- 환경 적용: 스크립트를 현재 shell에 적용하려면 source script.sh 사용 → 영구 적용하려면 ~/.bashrc에 추가
- Bash는 명령어 캐싱: $PATH 내 파일 이동 시 ENOENT 발생 → hash -r로 캐시 갱신
- 변수 미인용 사용 시 줄바꿈이 공백으로 처리
- set -e: 스크립트 오류 시 즉시 종료하지만, 조건문 내부(||, &&, if)에서는 동작 안 함
- K8s livenessProbe와 디버거 충돌: 브레이크포인트 디버거는 앱 전체를 멈추게 하여 health check 응답 실패 → Pod가 종료될 수 있음
React
- 렌더링 코드에서 state 직접 수정
- Hook을 if/loop 안에서 사용 → 규칙 위반
- useEffect dependency array에 필요한 값 누락
- useEffect에서 정리(clean up) 코드 누락
- Closure trap: 오래된 state 캡처로 인해 버그 발생
- 잘못된 위치에서 데이터 변경 → 불순한 컴포넌트
- useCallback 사용 누락 → 불필요한 리렌더링 발생
- 메모된 컴포넌트에 비메모 값 전달 시 memo 최적화 무효화
Git
- Rebase는 히스토리 재작성
- rebase 후 일반 push는 충돌 → 반드시 force push 필요
- remote branch 히스토리 변경 시 pull도 --rebase 사용
- --force-with-lease는 일부 경우 다른 개발자 commit 덮어쓰기 방지 가능, 단 fetch만 하고 pull 안 하면 보호 안 됨
- Merge revert 문제
- Merge revert는 효과 불완전 → 동일 브랜치 다시 merge 시 아무 변화 없음
- 해결책: revert의 revert 실행 또는 깨끗한 방법(backup → reset → cherry-pick → force push)
- GitHub 관련 주의사항
- API 키 같은 secret을 commit 후 force push로 덮어도 GitHub에는 기록이 남음
- private repo A를 fork한 B가 private이라도, A가 public이 되면 B의 내용도 공개됨 (삭제 후에도 접근 가능)
- git stash pop: conflict 발생 시 stash가 drop되지 않음
- .DS_Store는 macOS가 자동 생성 → .gitignore에 **/.DS_Store 추가 권장
Networking
- 일부 라우터·방화벽은 유휴 TCP 연결을 조용히 끊음 → HTTP 클라이언트·DB 클라이언트의 커넥션 풀 무효화 가능 → 해결: TCP keepalive 설정
- traceroute 결과는 신뢰성 낮음 → 경우에 따라 tcptraceroute가 더 유용
- TCP slow start는 대기시간 증가 원인 → tcp_slow_start_after_idle 비활성화로 해결 가능
- TCP sticky packet 문제: Nagle 알고리즘은 패킷 전송 지연 → TCP_NODELAY 활성화로 해결 가능
- Nginx 뒤에 백엔드 배치 시 커넥션 재사용 설정 필요 → 미설정 시 고부하 환경에서 내부 포트 부족으로 연결 실패
- Nginx는 기본적으로 패킷 버퍼링 → SSE(EventSource) 지연 발생
- HTTP 표준은 GET·DELETE 요청 body를 금지하지 않음 → 일부는 body 사용하지만 많은 라이브러리·서버가 지원하지 않음
- 하나의 IP에 여러 웹사이트 호스팅 가능 → 구분은 HTTP Host 헤더와 TLS의 SNI가 담당 → 단순 IP 접속 불가 사이트 존재
- CORS: 다른 origin 요청 시 브라우저는 응답 접근 차단 → 서버에서 Access-Control-Allow-Origin 헤더 설정 필요
- 쿠키 전달 포함 시 추가 설정 필요
- 프론트엔드와 백엔드가 동일 도메인·포트라면 CORS 문제 없음
Other
- YAML 주의사항
- YAML은 공백 민감 → key:value는 오류, key: value가 올바름
- 국가 코드 NO는 따옴표 없이 쓰면 false로 해석되는 문제 발생
- Git commit hash를 따옴표 없이 쓰면 숫자로 변환될 수 있음
- Excel CSV 문제
- Excel은 CSV 열 때 자동 변환 수행
- 날짜 변환: 1/2, 1-2 → 2-Jan
- 대형 숫자 부정확 변환: 12345678901234567890 → 12345678901234500000
- 원인은 Excel이 내부적으로 floating point로 숫자를 처리하기 때문
- 이슈로 인해 유전자 이름 SEPT1이 잘못 변경된 사례 존재
- Excel은 CSV 열 때 자동 변환 수행
반응형
'프로그래밍 > Script' 카테고리의 다른 글
| escape , encodeURIComponent 차이 (0) | 2025.08.21 |
|---|---|
| [JQUERY] jquery 이용해서 페이지 내의 a 태그의 href 를 가져와라 (0) | 2025.06.05 |
| [JSON] jQuery를 사용하여 pageSeq 배열에서 pageseq:7보다 작은 것 중 가장 큰 값과 7보다 큰 것 중 가장 작은 값을 찾는 함수 (0) | 2025.02.17 |
| [javascript] input 정규식 사용시 모바일 천지인 키보드 입력(여예요) 안될 경우 (0) | 2024.12.18 |
| 45 JavaScript Super Hacks Every Developer Should Know (3) | 2024.10.21 |
