반응형
Classic ASP에서 GUID 생성 방법
Classic ASP에서 브라우저에 접속한 사용자의 고유한 키 값을 생성하기 위해 주로 사용하는 방법은 **GUID(Globally Unique Identifier)**를 생성하는 것입니다. GUID는 전 세계에서 유일한 값을 가지도록 설계된 128비트 값으로, 사용자의 고유 세션이나 식별자를 만들 때 유용합니다.
Classic ASP에서 GUID 생성 방법
ASP에서 GUID를 생성하는 가장 쉬운 방법은 Scriptlet.TypeLib을 사용하여 GUID를 만드는 것입니다. 다음은 Classic ASP에서 GUID를 생성하여 고유 키를 얻는 코드입니다.
<%
Function GenerateGUID()
    Dim objTypeLib
    Set objTypeLib = CreateObject("Scriptlet.TypeLib")
    GenerateGUID = objTypeLib.Guid
    Set objTypeLib = Nothing
End Function

' 생성된 GUID 호출 예제
Dim uniqueKey
uniqueKey = GenerateGUID()

' 브라우저에 출력
Response.Write "Generated Unique Key: " & uniqueKey
%>
설명
- CreateObject("Scriptlet.TypeLib"): Scriptlet.TypeLib 객체는 GUID를 생성할 수 있는 COM(Component Object Model) 객체입니다.
- GenerateGUID = objTypeLib.Guid: .Guid 속성을 호출하면 GUID 값을 반환합니다. 이 값은 일반적으로 { }로 감싸진 문자열로 출력됩니다.
- 고유한 키 사용: 생성된 uniqueKey를 쿠키, 세션 변수 등에 저장하여 사용자 식별 등에 사용할 수 있습니다.
고유 키 생성 방법의 활용
- 세션 관리: 로그인 세션 관리에 활용할 수 있습니다.
- 추적 및 분석: 방문자를 추적하거나 분석할 때 유용합니다.
- 데이터베이스 키: 사용자별 고유한 데이터베이스 키로 사용할 수 있습니다.
이 방법을 사용하면 Classic ASP에서 손쉽게 고유한 키 값을 생성하여 사용할 수 있습니다.
반응형
'프로그래밍 > Web' 카테고리의 다른 글
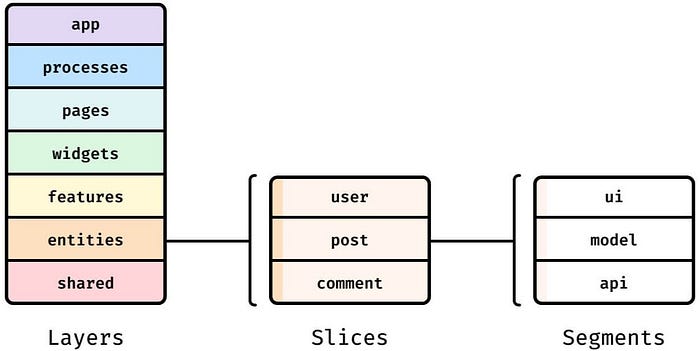
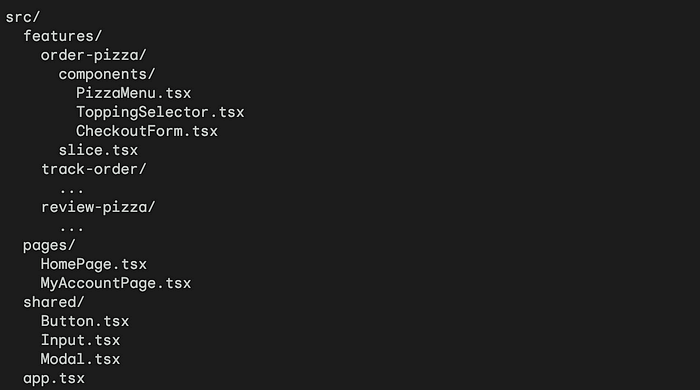
| Frontend Masters: Feature-Sliced Design (FSD) Pattern (0) | 2024.05.17 |
|---|---|
| [HTML] sns 용 META tag (0) | 2024.03.18 |
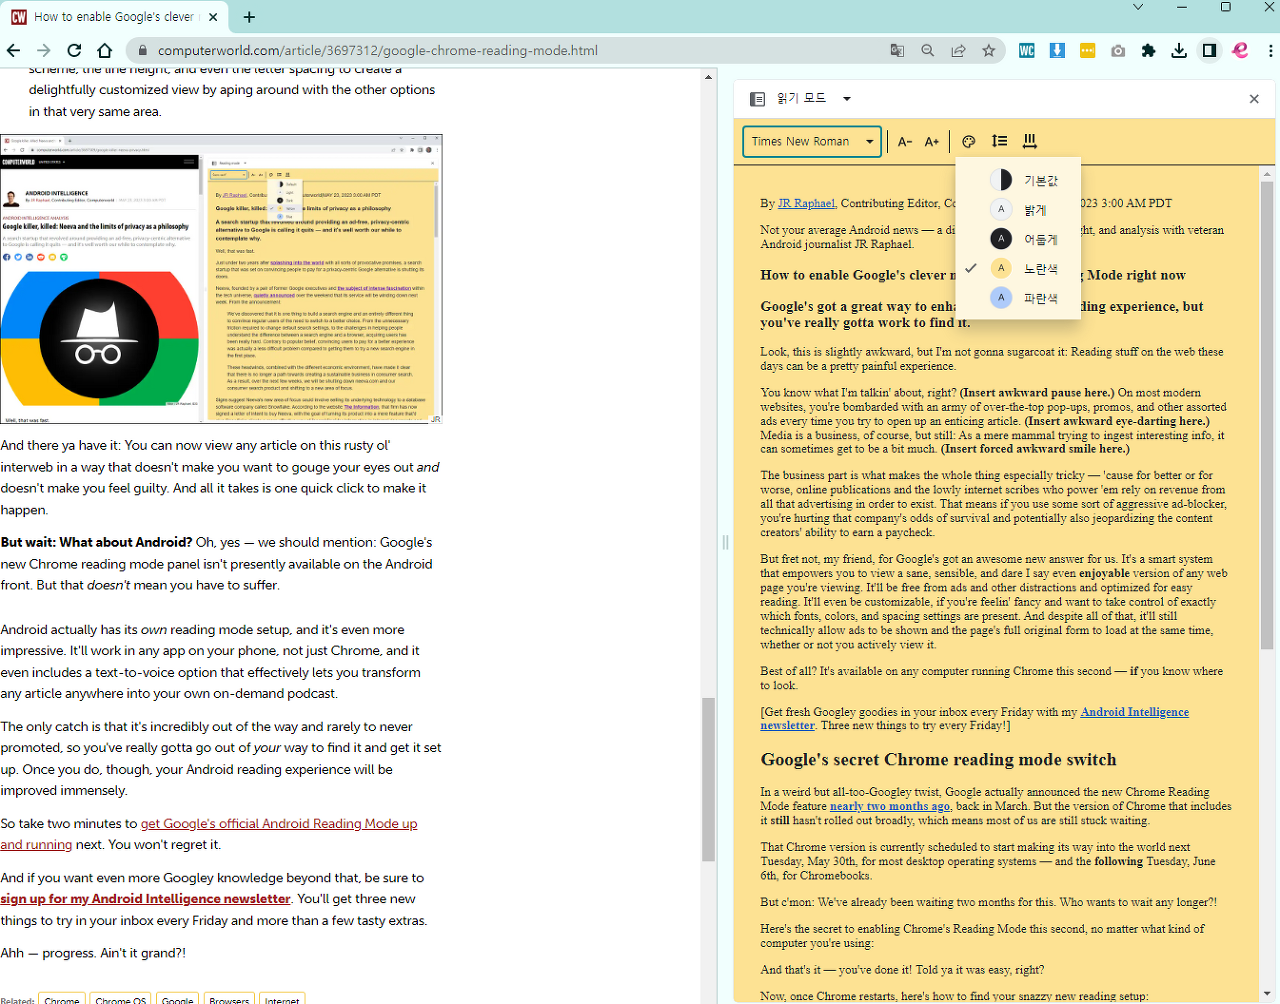
| [Chrome] 크롬 브라우저의 읽기 모드 (0) | 2023.08.03 |
| PHP 프레임워크: 생산성 및 품질 향상. PHP는 그렇게 나쁘지 않은데 왜 싫어할까요? (0) | 2023.08.03 |
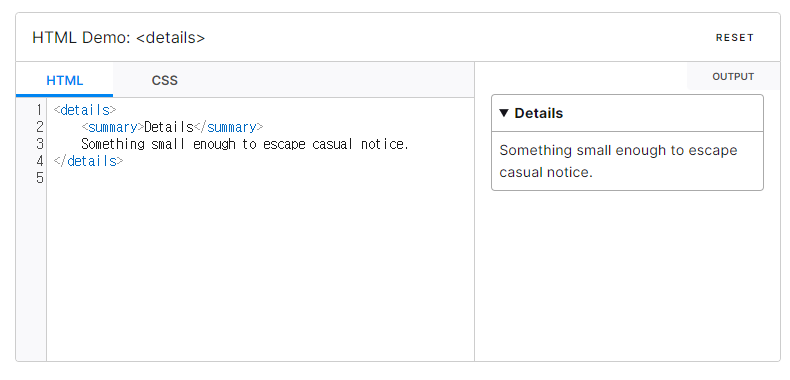
| [HTML] details summary , jquery로 open 제어 (0) | 2023.07.14 |