
반응형
1. 랜섬웨어 방지 대국민 행동
1) PC를 켜기 전 네트워크 단절
- 랜선 뽑기
- 와이파이 끄기
2) 감염 경로 차단
- 방화벽 설정 변경
3) 인터넷 재연결 후 보안 업데이트
- 윈도우 보안 패치 실행
- 백신 프로그램 업데이트
2. 파일 공유 기능 해제 - 방화벽 설정
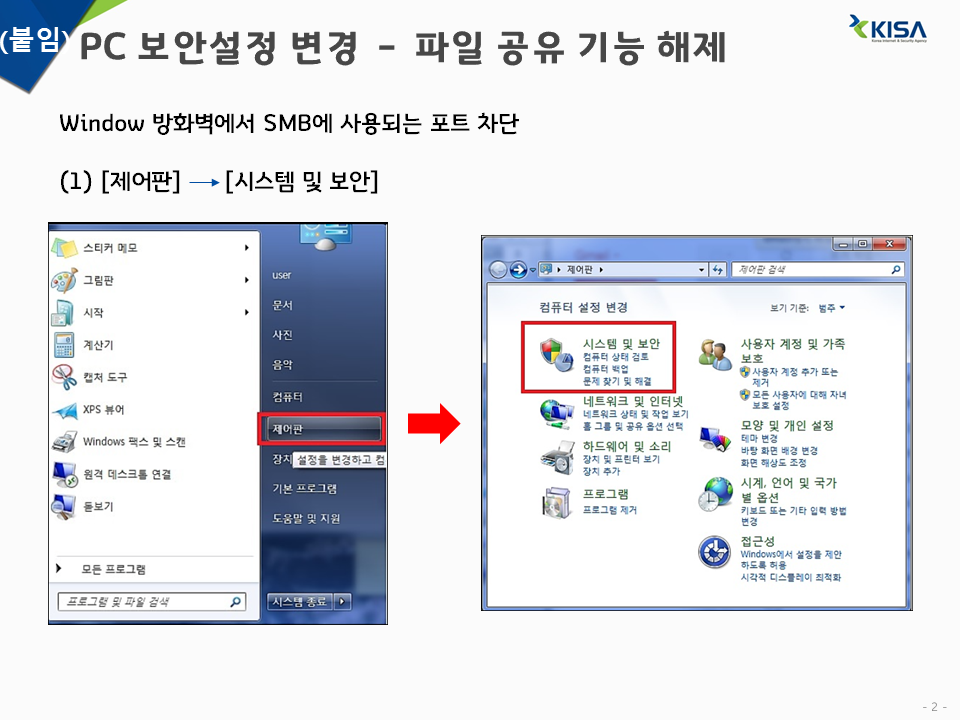
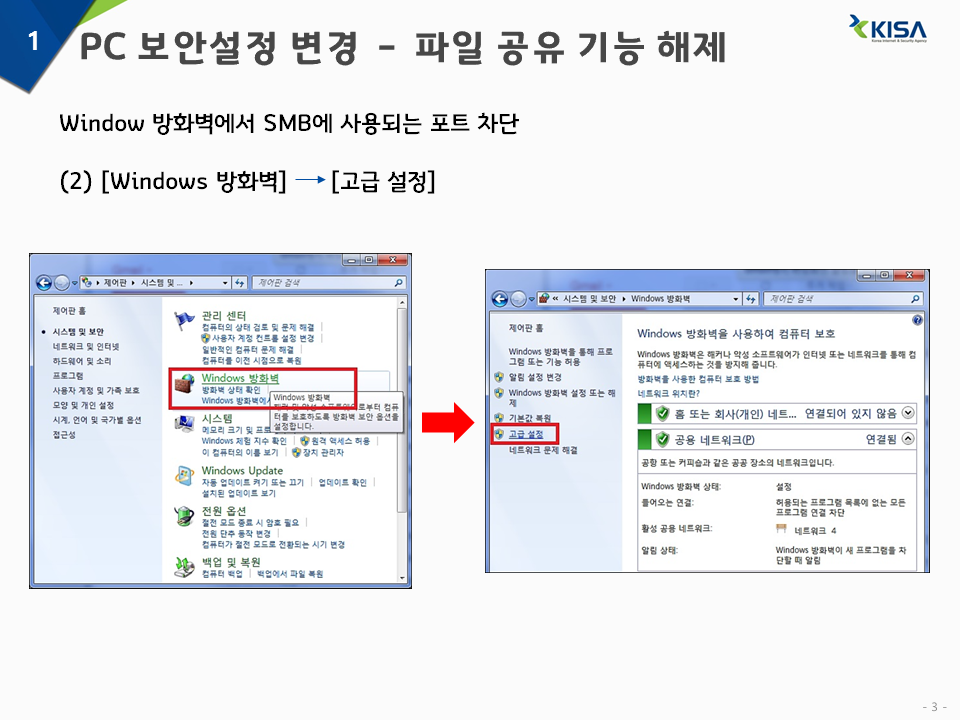
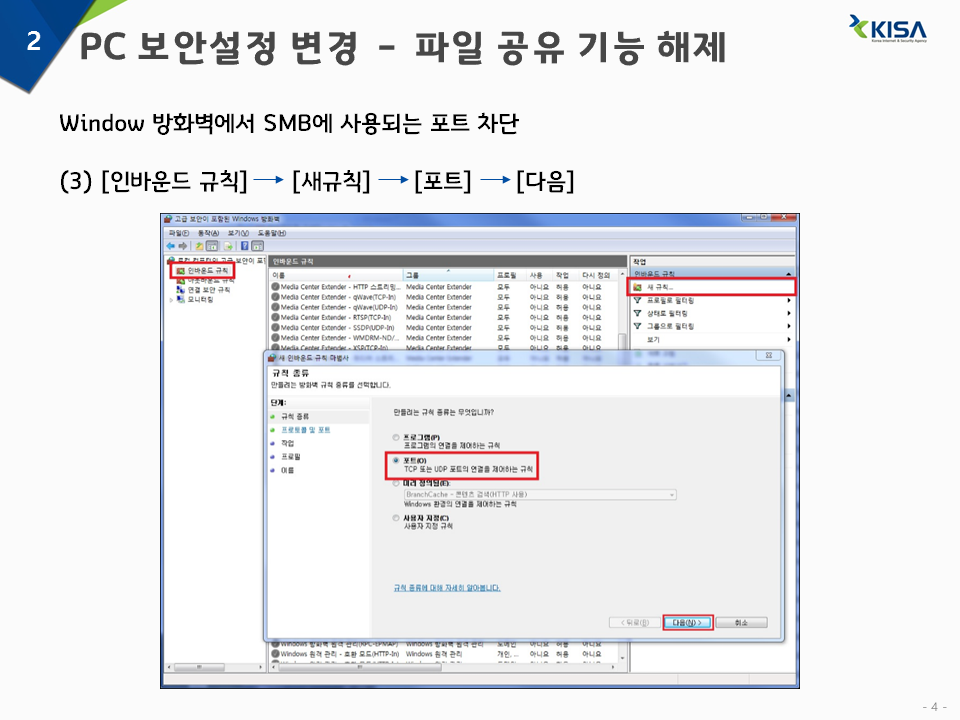
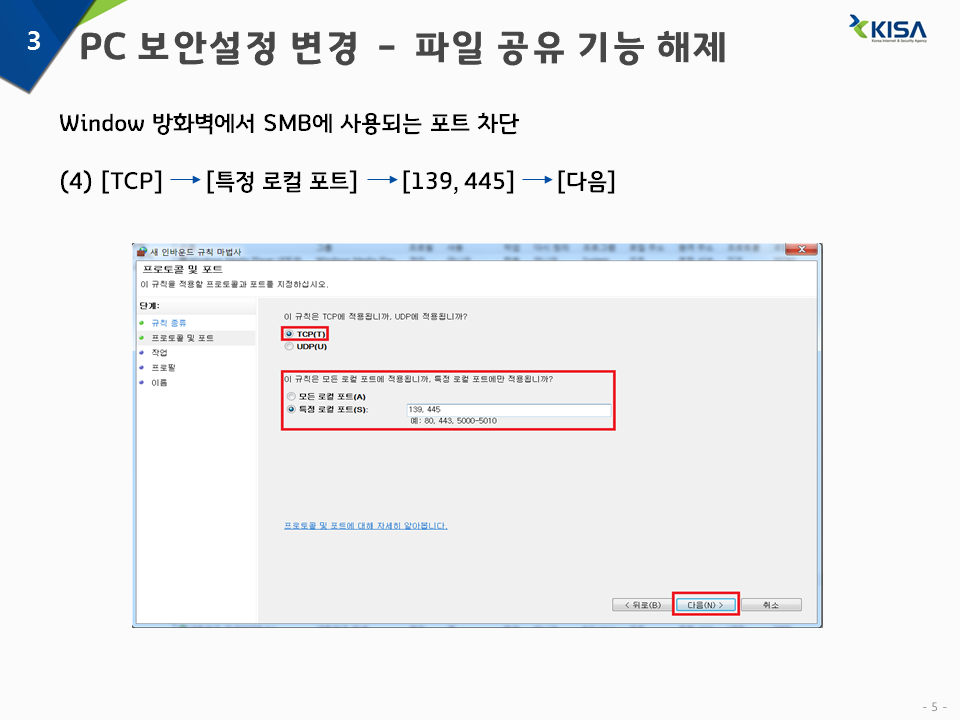
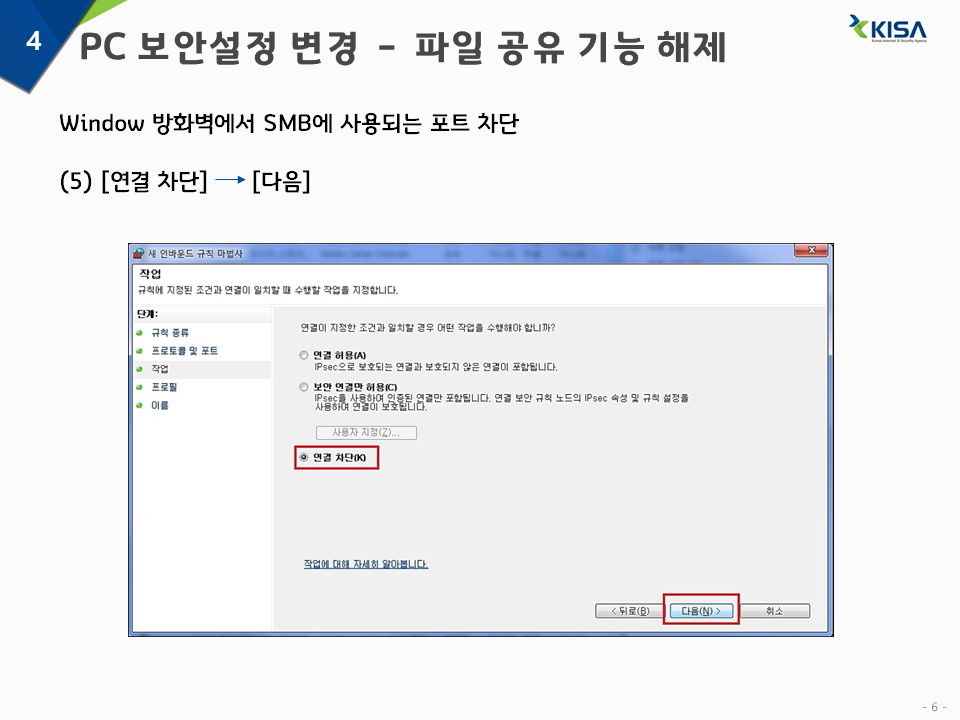
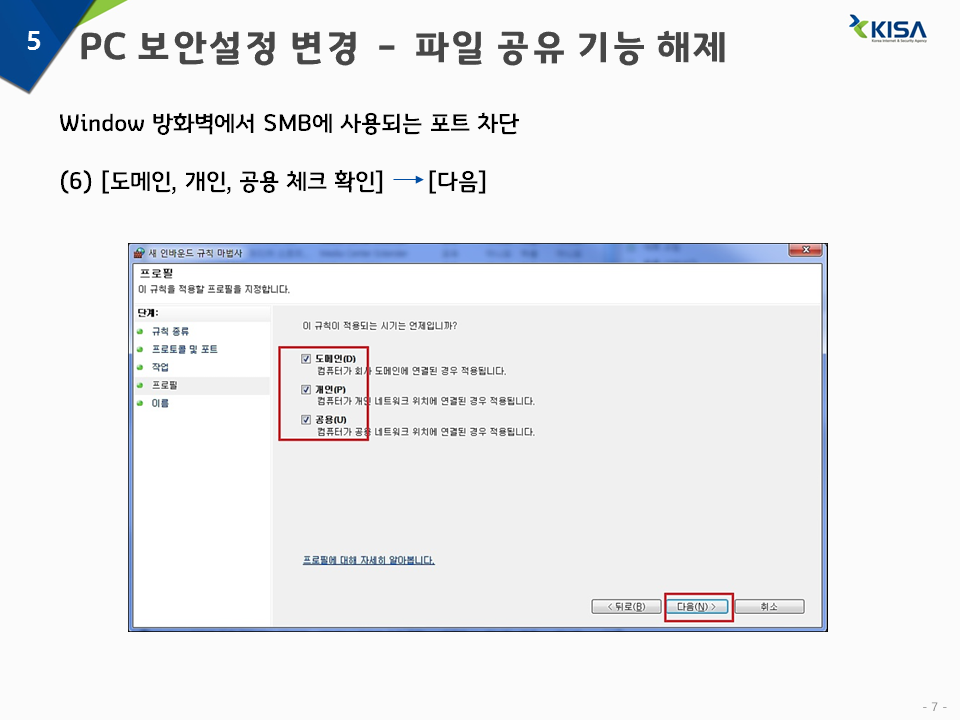
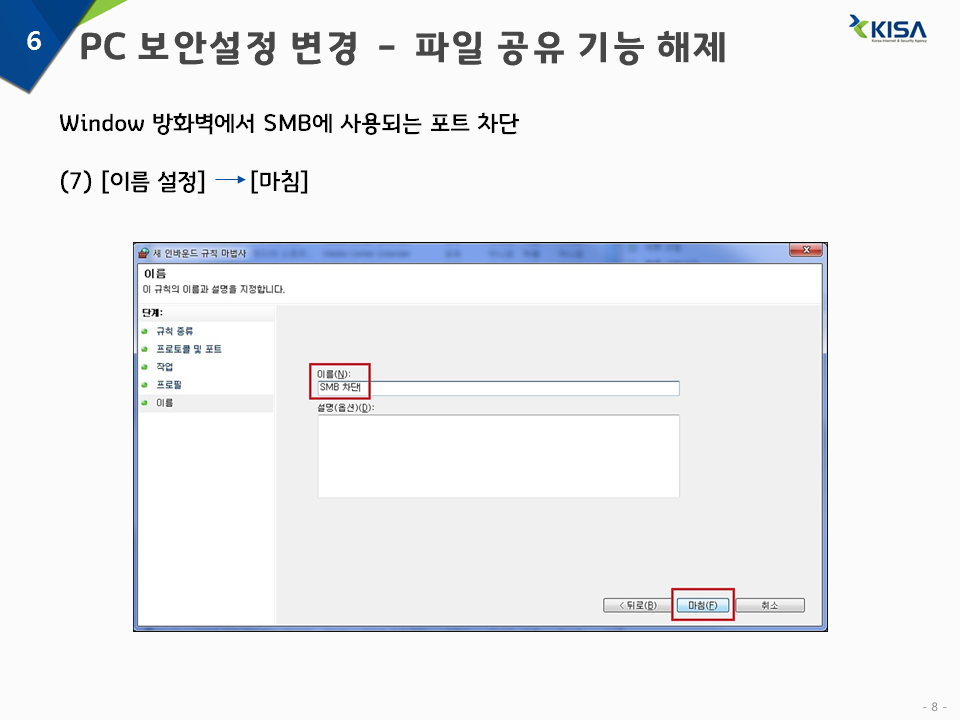
Window 방화벽에서 SMB에 사용되는 포트 차단
1) 제어판 -> 시스템 및 보안
2) Windows 방화벽 -> 고급 설정
3) 인바운드 규칙 -> 새규칙 -> 포트 -> 다음
4) TCP -> 특정 로컬 포트 -> 139,445 -> 다음
5) 연결 차단 -> 다음
6) 도메인, 개인, 공용 체크 확인 -> 다음
7) 이름 설정 -> 마침

반응형
'프로그래밍 > Server' 카테고리의 다른 글
| [Window] command 창 프로그램 - ConEmu (0) | 2017.07.25 |
|---|---|
| 네이버 클라우드 플랫폼 무료체험 이벤트 신청. (0) | 2017.06.02 |
| Apache Kafka - 분산 스트리밍 플랫폼 http://kafka.apache.org/ (0) | 2017.03.20 |
| 포트 오픈상태 확인 사이트 (0) | 2017.01.18 |
| 윈도우 호스트(hosts) 파일 변경하기 (0) | 2015.10.07 |


