
데이터 과학자를 위한 6가지 Python 팁
https://towardsdatascience.com/top-6-python-tips-for-data-scientists-4f4a25e44d15
Top 6 Python Tips for Data Scientists
Practical tips and tricks from my daily analytics projects
towardsdatascience.com
### 데이터 과학자를 위한 6가지 Python 팁
### Top 6 Python Tips for Data Scientists
### https://towardsdatascience.com/top-6-python-tips-for-data-scientists-4f4a25e44d15

codeString = '''a,b = 4,5; print(f"a = {a} and b = {b}"); print(f"a+b = {a+b}")'''
exec(codeString)

print("\n\n\n")


import os
import sys

#작업하는 경로(위치)가 어디인지 확인
print(os.getcwd())


exec(open("./Project/Datascientist/myFullFileName.py").read())

print("\n\n\n")

### 각각 현재 작업 디렉토리 또는 사용자 지정 디렉토리의 모든 파일을 나열합니다.
print( os.listdir() )


"""_summary_
"""
print("\n\n\n")

### 4. Code timer as a decorator
import time
import requests

def timerWrapper(func):
    """Code the timer"""

    def timer(*args, **kwargs):
        """Start timer"""
        start = time.perf_counter()

        output = func(*args, **kwargs)

        timeElapsed = time.perf_counter() - start
        print(f"Current function: {func.__name__}\n Run Time: {timeElapsed}")
        return output

    return timer

## Func to make a request to an user-defined url
@timerWrapper
def getArtile(url):
    return requests.get(url, allow_redirects=True)

## Monitor the runTime
if __name__ == "__main__":
    getArtile('https://towardsdatascience.com/6-sql-tricks-every-data-scientist-should-know-f84be499aea5')


print("\n\n\n")

## 이제 다른 함수의 시간을 측정 @timeWrapper하려면 함수 앞에 the를 놓는 것뿐입니다.
@timerWrapper
def getMultiplication(num):
    for val in range(num):
        print(10**(10**val))

getMultiplication(3)
Now, let’s jump right in!
- Dynamic execution with exec()

Dynamic Execution (Image Source)
Scenario: You inherited a Python project from a colleague, and immediately noticed that those scripts all have a whopping 5000+ lines of code. The same chunks (of code) got copied and pasted multiple times! So, is there a more efficient option to go about code reusability?
Let’s explore the exec() function in Python. Simply put, it takes in a string or object code, and execute it as shown in this example,
a = 4 and b = 5
a+b = 9
Even more handy? We can use exec(open().read()) to call and execute a file within the Python interpreter. For example,
With this powerful one-liner, data scientists can save programs that will be reused as standalone files, and execute them whenever needed within the main program. No code copying and pasting any more!
Being a cool functionality in Python, exec() has one pitfall to avoid — it does NOT return any value,
a = 4 and b = 5
a+b = 9
** Is the return from exec() is None? True **
As we can see, the output of the exec() function is None; hence, it cannot be used to store any values, which is equivalent to the sounce()function in R.
***Join our YouTube community 🎦 “Data Talks with Kat” 😄
2. Operating system commands with {os} and {shutil}
Scenario: continue from our previous tip, now you want to check out the script before executing it. Don’t bother to double-click your mouse all the way through to open up the file? No problem, you can easily achieve this in Python directly without interrupting your train of thought.
Here, the os.startfile() function allows users to open up any type of files, including MS documents, Excels, R and SQL scripts.
Similarly, we can also delete a FILE using os.remove(“myFullFileName.ANYFORMAT”)
or delete the entire DIRECTORY using shutil.rmtree(“folderToBeRemoved”). where {shutil} is a Python module that offers a number of high-level file operations, particularly for file copying and removal.
Therefore, if you haven’t used {os} other than os.getcwd() or os.chdir() or if the {shutil} sounds unfamiliar, it’s time to check out their documents. You will definitely find useful commands or file system methods that make your coding easier. Here lists a few of my favorites,
- os.listdir() or os.listdir(“someDirectory”) — list all files in the currently working directory or any user-specified directory, respectively;
- os.path.join() — automatically create a path with elements in the arguments for later use, e.g., os.path.join(‘D’, ‘Medium’, ‘New Folder’) will return
‘D\\Medium\\New Folder’- os.makedirs() — create a directory;
- shutil.copy2(“sourcePath”, “destinationPath”) or shutil.move(“sourcePath”, “destinationPath”) — copy or cut a file respectively.
3. One-liner: Nested list comprehension to get rid of the for loops
Scenario: this “simple” task we come across is to combine several lists into one big long list,
Surely, we can write five nested for loops to append each sublist to the final output list. But it’s smarter to turn to nested list comprehension for the most concise way,
4. Timer wrapped as a decorator

Timer as a decorator (Image Source)
Scenario: while Python is recognized as one of the most effective programming languages, data scientists still need to check the runtime of our programs.
It’s not the hardest thing if we just implement a bare-bones Python timer for each function we want to monitor. However, if we code it as a decorator, we would make our timer much easier to be version-controlled and reused!
Here is how,
In this snippet,
- the timer is wrapped in a timerWrapper function, which then is used as a decorator called prior to the main function;
- The example main function is to return a request connecting to an URL, which is one of my previous blogs.
Running this code gives us the time elapsed,
Current function: getArtile
 Run Time: 1.6542516000008618Out[101]: <Response [200]>
Now, to time another function, all we need is to put the @timeWrapper in front of the function,
getMultiplication(3)
10
10000000000
10000000000000000000000000000000000000000000000000000000000000000000000000000000000000000000000000000
Current function: getMultiplication
 Run Time: 0.00014700000065204222
5. Leverage the options system to customize your display
Scenario: as data scientists, we analyze data with {pandas} and {numpy} on a daily basis. When I first learned coding in Python, I was frustrated seeing this after reading my data into the IDE,
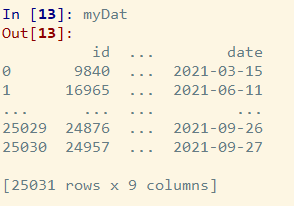
Clearly, data display is cut off both row-wise and column-wise, and the following code can fix it,
Here, we are explicitly setting the maximum columns, rows and column width to display/print in the console. There are numerous customizable options and settings in {pandas}, and similar operations are also available in {numpy} for arrays and matrix,
6. Reproduce your machine learning model results? Set seeds!
Scenario: Due to the stochastic nature of machine learning modeling process, we have all encountered the non-deterministic aspect of machine learning. This randomness results in our difficulty reproducing the same results across different runs. Consequently, it’s challenging to figure out whether an improvement in performance metrics is a result of successful model tuning or simply a different random training/testing sample.
Luckily the reproducibility can be achieved by setting the random seed throughout your model pipeline, provided that you do it correctly! How many times have you seen questions like “Getting a different result despite random seed defined” popping up on Stack Overflow? Well, how to appropriately set seeds should be in the first page of documentations, but it took me some time to dig it out.
I found that NOT every seed is defined the same in {numpy}, {sklearn}, {tensorflow} or {torch}. Thus, it’s a best practice to use a definitive function that sets all SEEDS for all your frameworks. For example,
Adding this tactical reset_random_seed() function to all necessary steps of your workflow, such as train-test split, model compile/training, and interpretation, will get you half way to full reproducibility. More detailed visibility into your experiments will finish the second half!
'프로그래밍 > Python' 카테고리의 다른 글
| [PYTHON] FLASK 플라스크 (0) | 2023.02.07 |
|---|---|
| [python] Python 3.11: 진정으로 즐길 수 있는 새로운 기능 (0) | 2023.01.25 |
| React와 Django로 웹 서비스 뚝딱 세팅하기 (feat. Webpack, Redux, django rest framework, PWA) (0) | 2023.01.09 |
| [python] 데이터 형식 변환 (Data Type Conversion) (0) | 2022.12.22 |
| [python] 환경변수 관련. os, sys (0) | 2022.12.20 |