반응형
카카오 플러스친구 Github 정보
플러스친구 자동응답 API : https://github.com/plusfriend/auto_reply
카카오톡 플러스친구 API v. 2.0 개요
이 문서는 플러스친구를 통하여 자동응답 기능을 이용하고자 할 때 사용되는 API에 대해 기술합니다.
1. 이용에 대한 참고사항
- 서버간 통신은 보안을 위하여 HTTPS를 쓰도록 권장합니다.
- HTTPS를 통하여 API를 이용하는 파트너사 서버는 유효한 공인인증서를 사용해야 합니다.
- user_key는 외부에 노출되지 않도록 주의해 주시기 바랍니다.
- 플러스친구 API 운영에 대한 정책 및 가이드라인은 플러스친구 이용약관의 API 플랫폼 운영정책을 참고해 주시기 바랍니다.
2. 개인정보 수집 및 이용에 대한 주의사항
- API 이용에 대한 주의사항은 서비스 이용약관 '제 26 조 API 플랫폼 서비스'를 따르며, 이를 준수하지 않을 경우 API 서비스 제공을 중단할 수 있습니다.
- 회원이 API 플랫폼 서비스를 이용하는 과정에서 이용자의 개인정보 수집이 필요한 경우, 이용자로부터 개인정보 수집 및 이용에 대한 명시적인 동의를 받아야 합니다.
- 카카오는 '개인정보 취급위탁 동의'에 따라 안전하게 개인정보 처리 업무를 진행합니다.
3. 이용 시작하기
3.1. 플러스친구 앱 생성
플러스친구에서 자동응답 기능을 사용하기 위해서는 먼저 운영툴을 통해 key 발급을 위한 앱을 등록해야 합니다.
- 플러스친구 운영툴의 좌측 '스마트채팅' 메뉴에서 'API형'을 선택합니다.
- 앱 정보와 모니터링 메시지를 수신할 전화번호를 입력하고, 개인정보 수집 및 이용에 동의한 뒤 정보를 저장하여 앱을 생성합니다.
3.2. 자동응답 서비스 시작
자동응답 서비스가 개발 완료되어 서비스 가능한 상태가 되면, 다음 단계에 따라 서비스를 시작할 수 있습니다.
- API TEST : 등록한 앱 url 우측의 API TEST 버튼을 클릭하여 서비스 시작 가능여부를 체크합니다. 필수 API인 Home Keyboard API가 정상적인 응답을 받지 못하는 경우 서비스 시작이 불가합니다.
- 서비스 시작 : API 테스트를 통과한 경우, 서비스 시작 버튼을 클릭하면 자동응답 서비스가 시작됩니다.
- 기존에 (구) 플러스친구 API를 통해 사용중이던 봇이 있는 경우, 신규 API를 통해 자동응답 서비스를 시작하게 되면 (구)API를 이용한 봇은 자동으로 종료되며 다시 (구) 봇의 형태로 이용할 수 없습니다.
- (구) 플러스친구에서 제공하던 테스트 플친은 더이상 제공되지 않습니다. 실서비스 적용 전 테스트를 원하시는 경우 테스트 전용으로 사용하실 별도의 플러스친구 계정을 생성하여 테스트를 진행해 주시기 바랍니다.
- 신규 API 자동응답은 키워드형 자동응답과 동시에 사용할 수 없습니다. 다만 API 자동응답의 서비스 중지 후 키워드형 자동응답을 사용하는 것은 가능합니다.
3.3. 자동응답 서비스 중지
- 직접 중지 : 더 이상 자동응답 서비스를 이용하지 않으시려면, 운영툴의 자동응답 > 자동응답 API 메뉴에서 '서비스 중지'를 통해 자동응답 기능을 중지할 수 있습니다.
- 오류 횟수 초과에 따른 중지 : 자동응답 서비스에서 오류가 발생하는 경우, 카카오는 앱 정보에 등록된 전화번호를 통해 모니터링 메시지를 발송합니다. 만일 오류 횟수가 일 3000건을 초과하게 되면 카카오는 자동으로 해당 앱의 서비스를 중지합니다. 오류 횟수 초과로 인해 중지된 앱은 운영툴에서 오류 수정 후 직접 다시 서비스를 시작할 수 있습니다.
- 관리자의 차단에 따른 중지 : 파트너사에서 플러스친구 API의 운영정책에 반하는 내용을 API를 통해 서비스하는 것이 확인된 경우, 카카오의 관리자는 해당 앱의 서비스를 중지할 수 있습니다. 관리자에 의해 차단된 앱은 직접 서비스를 다시 시작할 수 없으므로, 앱의 차단 사유를 확인하신 뒤 문제가 되는 내용을 수정하여 플러스친구 고객센터(1544-4293)를 통해 차단 해제를 요청해 주시기 바랍니다.
3.4. 클라이언트 테스트
자동응답 기능의 서비스가 시작되면 카카오톡 채팅방에서 직접 자동응답 기능을 실행할 수 있습니다. 신규 자동응답 API를 통한 자동응답 기능은 카카오톡 앱 안드로이드/iOS 5.4.0 버전부터 지원됩니다.
- 수정된 내용의 반영은 최대 1분까지 소요될 수 있으며, 채팅방을 나갔다 들어오는 시점을 기준으로 정보를 새로고침합니다.
- 1depth 이상의 자동응답을 구현하는 경우, 카카오톡에서는 자동응답 대화의 맥락을 유지하기 위해 이전 자동응답의 정보를 메시지 수신으로부터 10분간 보관합니다. 메시지를 받은 후 10분이 경과되면 자동으로 기존의 대화 맥락은 expire되며 Home keyboard 를 호출합니다.
- 클라이언트를 통해 노출되는 안내문구 ('원하는 버튼을 선택하세요')는 고정 문구로, 커스터마이즈할 수 없습니다.
- 실서비스 적용 전 테스트를 원하시는 경우 별도의 플러스친구를 생성하여 테스트를 진행해보실 수 있습니다.
...
반응형
'프로그래밍 > AI_DeepLearning' 카테고리의 다른 글
| [KAKAO] 플러스친구, 관리자센터 (0) | 2017.08.11 |
|---|---|
| [kakao] 카카오가 얘기하는 AI (0) | 2017.08.11 |
| [Chatbot] Chatfuel.com으로 손쉽게 페이스북메신저 챗봇 만듬. (0) | 2017.08.10 |
| [Chatbot] chatfuel 로 챗봇 테스트해봄 (0) | 2017.08.09 |
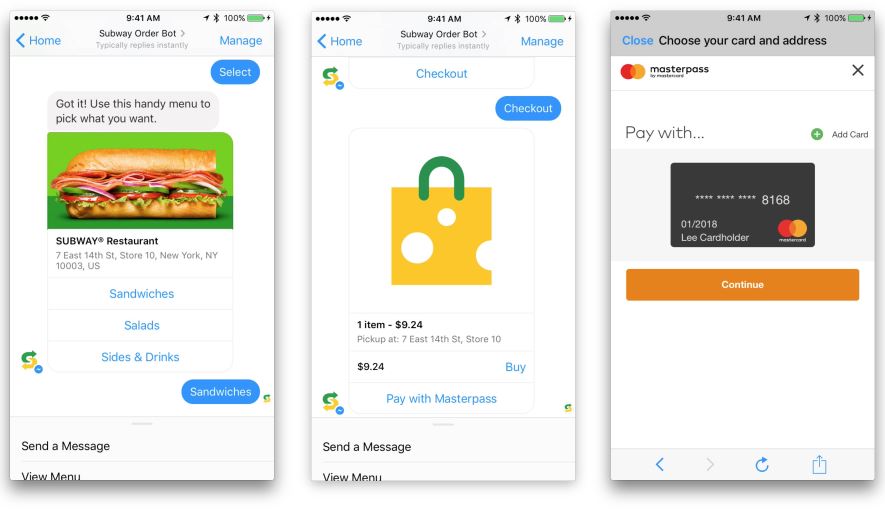
| [ChatBot] 페이스북 메신저 챗봇과 대화하니 음식 주문에서 결제까지 '쭉' (0) | 2017.08.09 |