60 Top jQuery Plugins of 2013
fullPage.js
 A simple and easy to use plugin to create fullscreen scrolling websites. (also known as single page websites) It allows to create fullscren scrolling websites as well as adding some landscape sliders inside the sections of the site.
Source
SlideMe
 A responsive, css3, compatible (works fine even with IE7), customizable, easy to install (and use), multi-instance, fullscreen, cool, powerful slideshow plug-in for jQuery.
Source
Tabslet
 Yet another jQuery plugin for tabs with some extra features like custom events, rotation and animation.
Source
Textillate.js
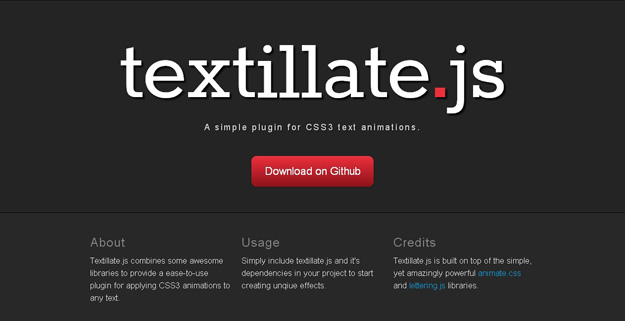
 A simple plugin for CSS3 text animations.Textillate.js combines some awesome libraries to provide an easy-to-use plugin for applying CSS3 animations to any text.
Source
Snap.svg
 SVG is an excellent way to create interactive, resolution-independent vector graphics that will look great on any size screen. And the Snap.svg JavaScript library makes working with your SVG assets as easy as jQuery makes working with the DOM.
Source
Maplace.js
 A small jQuery Plugin for Google Maps
Source
Scrolld.js
 Scrolld.js is a unique open source plugin for jQuery. Scrolld.js provides a method for highly precise scrolling for pixel-perfect layouts and navigation using real-time updated data values. With Scrolld.js your scrolling to items will always be exact and will always provide the best user experience. Scrolld.js is specifically designed to support responsive designs and turns navigating long pages into a simple task.
Source
Free Wall
 Freewall is a cross-browser and responsive jQuery plugin to help you create many types of grid layouts: flexible layouts, images layouts, nested grid layouts, metro style layouts, pinterest like layouts … with nice CSS3 animation effects and call back events. Freewall is all-in-one solution for creating dynamic grid layouts for desktop, mobile and tablet.
Source
One Page Scroll
 One Page Scroll let you transform your website into a one page scroll website that allows users to scroll one page at a time. It is perfect for creating a website in which you want to present something to the viewers.
Source
Flowtype.js
 Ideally, the most legible typography contains between 45 and 75 characters per line. This is difficult to accomplish for all screen widths with only CSS media-queries. FlowType.JS eases this difficulty by changing the font-size—and subsequently the line-height—based on a specific element’s width. This allows for a perfect character count per line at any screen width.
Source
Albumize
 Albumize is a jQuery plugin that lets you manage collection of images in the web page as albums. With albumize, you can browse albums, add cover image to albums and switch between albums.
Source
Smint
 Smint is a simple jQuery plugin that helps with the navigation on one page style websites.It has 2 main elements, a sticky navigation bar that stays at the top of the page while you scroll down and menu buttons that automatically scroll the page to the section you clicked on.
Source
Loda Button
 jQuery plugin that animates the button icon with CSS3 when loading
Source
Scrollocue
 Scrollocue is a jQuery plugin for building a simple autocue/teleprompter system, to scroll through lines of text.Walk through the autocue text with the arrows, space bar or just click.
Source
floatlabels.js
 On User Interaction with an input field the placeholder value moves up, and is displayed above the typed text.
Source
jQuery Label Better
 Label your form input like a boss with beautiful animation and without taking up space
Source
Tabulous.js
 A jQuery tabs module for todays web.Tabulous.js can be used with any contents you choose in the tabs and it couldn’t be more simpler to use.
Source
Headroom.js
 Headroom.js is a lightweight, high-performance JS widget (with no dependencies!) that allows you to react to the user’s scroll. The header on this site is a living example, it slides out of view when scrolling down and slides back in when scrolling up.
Source
jQuery Knob
 Nice, downward compatible, touchable, jQuery dial.Implemented interactions : mouse click and wheel mouse, keyboard (on focus) and fingers (touch events).
Source
jQuery Gridly
 Gridly is a jQuery plugin to enable dragging and dropping as well as resizing on a grids. In the example below try tapping or dragging any of the bricks.
Source
FloatLabel.js
 A jQuery plugin for floating form labels.As FloatLabel.js works by using CSS classes, the animations can be tweeked within jquery.FloatLabel.css.If the default classes conflict with the rest of your CSS for whatever reason, you can change them by passing in paramaters when you initialise the plugin. Don’t forget to update jquery.FloatLabel.css with your new class names if you need to make a change.
Source
Succinct
 A tiny jQuery plugin for truncating multiple lines of text.
Source
JResponsive
 A simple jQuery plugin that allows you to add a dynamically-resized layout to any page or element, customize the layout the way you want with or without top,right,left or bottom navigations
Source
Salvattore
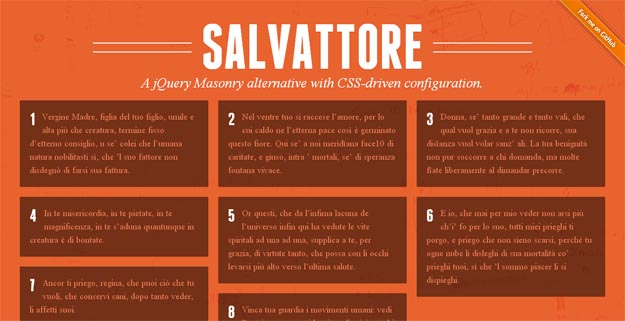
 A jQuery Masonry alternative with CSS-driven configuration.Salvattore distributes your grid items according to the number of columns you specify. Each of the items in your grid is placed within these columns, one by one.
Source
FlexNav
 FlexNav is a mobile-first example of using media queries and javascript to make a decent multi-level menu with support for touch, hover reveal, and keyboard tab input accessibility. Special attention is paid to touch screens using tap targets (the key feature of FlexNav).
Source
Sidr
 Sidr is a jQuery plugin for creating side menus and the easiest way for doing your menu responsive.
Source
jQuery ScrollNav
 A jQuery plugin for building a scrolling side navigation menu
Source
ScrollUp
 ScrollUp is a lightweight jQuery plugin to create a customisable “Scroll to top” feature that will work with any website, with ease.
Source
ContentShare
 ContentShare is a jQuery plugin which lets you share the exact content on a page which you actually want to share. It enables you to share selected text on your social network rather the default text specified in the meta tags.
Source
Formance.js
 A jQuery library for formatting and validating form fields, based on Stripe’s jQuery.payment library.
Source
slideToucher
 slideToucher, touch enabled jQuery plugin for content swiping. Supports vertical and horizontal swipes.
Source
FilmRoll
 FilmRoll is a lightweight jQuery carousel (8.4 kb) that focuses on one item at a time, centering it in the view, regardless of the relative sizes of the carousel items.
Source
Block Slide
 A CSS3 Animated Modal Window Image Gallery jQuery Plugin
Source
typeahead.js
 Inspired by twitter.com’s autocomplete search functionality, typeahead.js is a fast and fully-featured autocomplete library.
Source
Squishy
 Squishy is a jQuery plugin that automatically resizes text to exactly fit the container with no extra work on your part.
Source
stickUp
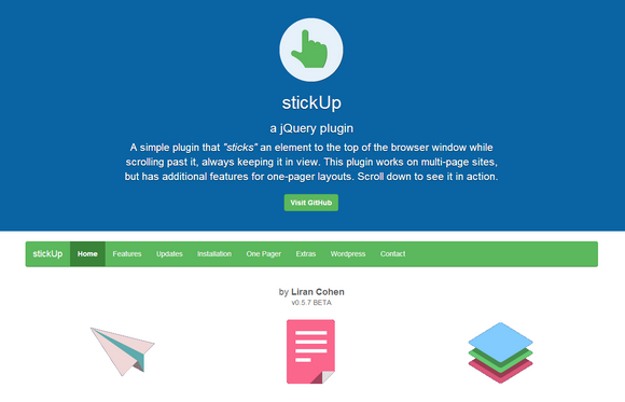
 A simple plugin that “sticks” an element to the top of the browser window while scrolling past it, always keeping it in view. This plugin works on multi-page sites, but has additional features for one-pager layouts.
Source
Glide.js
 Glide is responsive and touch-friendly jQuery slider. Based on CSS3 transitions with fallback to older broswers. It’s simple, lightweight and fast. Designed to slide, no less, no more.
Source
Riot.js
 An incredibly fast, powerful yet tiny client side framework for building large scale web applications.
Source
slidr.js
 A simple, lightweight javascript library for adding slide transitions to your page. No dependencies required.
Source
Query Popdown Plugin
 Sometimes you just need a little popdown to spice up your interface. Here are a few examples:
Source
Offline.js
 Offline.js is a library to automatically alert your users when they’ve lost internet connectivity, like Gmail.
Source
CircleType.js
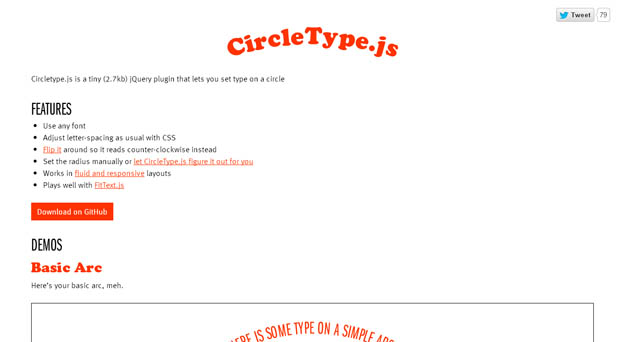
 Circletype.js is a tiny (2.7kb) jQuery plugin that lets you set type on a circle
Source
jQuery Valideasy
 Never write complex JS script again to handle your form validation rules! With Valideasy, everything’s done via HTML attributes added to your form fields.
Source
DropzoneJS
 DropzoneJS is an open source library that provides drag’n’drop file uploads with image previews.
Source
Odometer
 Odometer is a Javascript and CSS library for smoothly transitioning numbers.
Source
Rainyday.js
 A simple script for simulating raindrops falling on a glass surface.
Source
TogetherJS
 TogetherJS is a free, open source Javascript library by Mozilla that adds collaboration features and tools to your website. By adding TogetherJS to your site, your users can help each other out on a website in real time.
Source
pace.js
 Include pace.js and the theme css of your choice, and you get a beautiful progress indicator for your page load and ajax navigation.No need to hook into any of your code, progress is detected automatically.
Source
AnimateScroll
 AnimateScroll is a jQuery plugin which enables you to scroll to any part of the page in style by just calling the animatescroll() function with the Id or Classname of the element where you want to scroll to.
Source
CLNDR.js
 CLNDR is a calendar plugin that uses HTML templates, allowing you to write custom markup and styles that have access to useful calendar data.
Source
selectize.js
 Selectize is an extensible jQuery-based custom UI control. It’s useful for tagging, contact lists, country selectors, and so on. It clocks in at around ~7kb (gzipped). The goal is to provide a solid & usable experience with a clean and powerful API.
Source
favico.js
 Make a use of your favicon with badges, images or videos
Source
animo.js
 A powerful little tool for managing CSS animations. Stack animations, create cross-browser blurring, set callbacks on animation completion, make magic.
Source
Chart.js
 Easy, object oriented client side graphs for designers and developers
Source
CollagePlus
 This plugin for jQuery will arrange your images to fit exactly within a container. You can define the padding between images, give the images css borders and define a target row height.
Source
elementTransitions.js
 This repository is a wrapper around the code provided by a codrops article on page transitions. Their code has been modified to allow more than one animatable element per page. Additionally, you can now add transitions straight from html tags.
Source
Progression.js
 A jQuery plugin that gives users real time hints & progress updates as they complete forms.
Source
HeapShot
 jQuery HeapShot plugin is an image gallery plugin with a particular effect.
Source
Flat Shadow
 A small jQuery plugin that will automatically cast a shadow creating depth for your flat UI elements
Source
Intro.js
 Better introductions for websites and features with a step-by-step guide for your projects.
Source


 A simple and easy to use plugin to create fullscreen scrolling websites. (also known as single page websites) It allows to create fullscren scrolling websites as well as adding some landscape sliders inside the sections of the site.
 A responsive, css3, compatible (works fine even with IE7), customizable, easy to install (and use), multi-instance, fullscreen, cool, powerful slideshow plug-in for jQuery.
 Yet another jQuery plugin for tabs with some extra features like custom events, rotation and animation.
 A simple plugin for CSS3 text animations.Textillate.js combines some awesome libraries to provide an easy-to-use plugin for applying CSS3 animations to any text.
 SVG is an excellent way to create interactive, resolution-independent vector graphics that will look great on any size screen. And the Snap.svg JavaScript library makes working with your SVG assets as easy as jQuery makes working with the DOM.
 A small jQuery Plugin for Google Maps
 Scrolld.js is a unique open source plugin for jQuery. Scrolld.js provides a method for highly precise scrolling for pixel-perfect layouts and navigation using real-time updated data values. With Scrolld.js your scrolling to items will always be exact and will always provide the best user experience. Scrolld.js is specifically designed to support responsive designs and turns navigating long pages into a simple task.
 Freewall is a cross-browser and responsive jQuery plugin to help you create many types of grid layouts: flexible layouts, images layouts, nested grid layouts, metro style layouts, pinterest like layouts … with nice CSS3 animation effects and call back events. Freewall is all-in-one solution for creating dynamic grid layouts for desktop, mobile and tablet.
 One Page Scroll let you transform your website into a one page scroll website that allows users to scroll one page at a time. It is perfect for creating a website in which you want to present something to the viewers.
 Ideally, the most legible typography contains between 45 and 75 characters per line. This is difficult to accomplish for all screen widths with only CSS media-queries. FlowType.JS eases this difficulty by changing the font-size—and subsequently the line-height—based on a specific element’s width. This allows for a perfect character count per line at any screen width.
 Albumize is a jQuery plugin that lets you manage collection of images in the web page as albums. With albumize, you can browse albums, add cover image to albums and switch between albums.
 Smint is a simple jQuery plugin that helps with the navigation on one page style websites.It has 2 main elements, a sticky navigation bar that stays at the top of the page while you scroll down and menu buttons that automatically scroll the page to the section you clicked on.
 jQuery plugin that animates the button icon with CSS3 when loading
 Scrollocue is a jQuery plugin for building a simple autocue/teleprompter system, to scroll through lines of text.Walk through the autocue text with the arrows, space bar or just click.
 On User Interaction with an input field the placeholder value moves up, and is displayed above the typed text.
 Label your form input like a boss with beautiful animation and without taking up space
 A jQuery tabs module for todays web.Tabulous.js can be used with any contents you choose in the tabs and it couldn’t be more simpler to use.
 Headroom.js is a lightweight, high-performance JS widget (with no dependencies!) that allows you to react to the user’s scroll. The header on this site is a living example, it slides out of view when scrolling down and slides back in when scrolling up.
 Nice, downward compatible, touchable, jQuery dial.Implemented interactions : mouse click and wheel mouse, keyboard (on focus) and fingers (touch events).
 Gridly is a jQuery plugin to enable dragging and dropping as well as resizing on a grids. In the example below try tapping or dragging any of the bricks.
 A jQuery plugin for floating form labels.As FloatLabel.js works by using CSS classes, the animations can be tweeked within jquery.FloatLabel.css.If the default classes conflict with the rest of your CSS for whatever reason, you can change them by passing in paramaters when you initialise the plugin. Don’t forget to update jquery.FloatLabel.css with your new class names if you need to make a change.
 A tiny jQuery plugin for truncating multiple lines of text.
 A simple jQuery plugin that allows you to add a dynamically-resized layout to any page or element, customize the layout the way you want with or without top,right,left or bottom navigations
 A jQuery Masonry alternative with CSS-driven configuration.Salvattore distributes your grid items according to the number of columns you specify. Each of the items in your grid is placed within these columns, one by one.
 FlexNav is a mobile-first example of using media queries and javascript to make a decent multi-level menu with support for touch, hover reveal, and keyboard tab input accessibility. Special attention is paid to touch screens using tap targets (the key feature of FlexNav).
 Sidr is a jQuery plugin for creating side menus and the easiest way for doing your menu responsive.
 A jQuery plugin for building a scrolling side navigation menu
 ScrollUp is a lightweight jQuery plugin to create a customisable “Scroll to top” feature that will work with any website, with ease.
 ContentShare is a jQuery plugin which lets you share the exact content on a page which you actually want to share. It enables you to share selected text on your social network rather the default text specified in the meta tags.
 A jQuery library for formatting and validating form fields, based on Stripe’s jQuery.payment library.
 slideToucher, touch enabled jQuery plugin for content swiping. Supports vertical and horizontal swipes.
 FilmRoll is a lightweight jQuery carousel (8.4 kb) that focuses on one item at a time, centering it in the view, regardless of the relative sizes of the carousel items.
 A CSS3 Animated Modal Window Image Gallery jQuery Plugin
 Inspired by twitter.com’s autocomplete search functionality, typeahead.js is a fast and fully-featured autocomplete library.
 Squishy is a jQuery plugin that automatically resizes text to exactly fit the container with no extra work on your part.
 A simple plugin that “sticks” an element to the top of the browser window while scrolling past it, always keeping it in view. This plugin works on multi-page sites, but has additional features for one-pager layouts.
 Glide is responsive and touch-friendly jQuery slider. Based on CSS3 transitions with fallback to older broswers. It’s simple, lightweight and fast. Designed to slide, no less, no more.
 An incredibly fast, powerful yet tiny client side framework for building large scale web applications.
 A simple, lightweight javascript library for adding slide transitions to your page. No dependencies required.
 Sometimes you just need a little popdown to spice up your interface. Here are a few examples:
 Offline.js is a library to automatically alert your users when they’ve lost internet connectivity, like Gmail.
 Circletype.js is a tiny (2.7kb) jQuery plugin that lets you set type on a circle
 Never write complex JS script again to handle your form validation rules! With Valideasy, everything’s done via HTML attributes added to your form fields.
 DropzoneJS is an open source library that provides drag’n’drop file uploads with image previews.
 Odometer is a Javascript and CSS library for smoothly transitioning numbers.
 A simple script for simulating raindrops falling on a glass surface.
 TogetherJS is a free, open source Javascript library by Mozilla that adds collaboration features and tools to your website. By adding TogetherJS to your site, your users can help each other out on a website in real time.
 Include pace.js and the theme css of your choice, and you get a beautiful progress indicator for your page load and ajax navigation.No need to hook into any of your code, progress is detected automatically.
 AnimateScroll is a jQuery plugin which enables you to scroll to any part of the page in style by just calling the animatescroll() function with the Id or Classname of the element where you want to scroll to.
 CLNDR is a calendar plugin that uses HTML templates, allowing you to write custom markup and styles that have access to useful calendar data.
 Selectize is an extensible jQuery-based custom UI control. It’s useful for tagging, contact lists, country selectors, and so on. It clocks in at around ~7kb (gzipped). The goal is to provide a solid & usable experience with a clean and powerful API.
 Make a use of your favicon with badges, images or videos
 A powerful little tool for managing CSS animations. Stack animations, create cross-browser blurring, set callbacks on animation completion, make magic.
 Easy, object oriented client side graphs for designers and developers
 This plugin for jQuery will arrange your images to fit exactly within a container. You can define the padding between images, give the images css borders and define a target row height.
 This repository is a wrapper around the code provided by a codrops article on page transitions. Their code has been modified to allow more than one animatable element per page. Additionally, you can now add transitions straight from html tags.
 A jQuery plugin that gives users real time hints & progress updates as they complete forms.
 jQuery HeapShot plugin is an image gallery plugin with a particular effect.
 A small jQuery plugin that will automatically cast a shadow creating depth for your flat UI elements
 Better introductions for websites and features with a step-by-step guide for your projects.