
TOP 40 Free Flutter Templates 2023
https://cdmrkt.medium.com/top-40-free-flutter-templates-2023-4e282cdd076d
Are you an aspiring Flutter app developer? Or an already experienced developer looking for a good template to make your life easier? Then this article is for you both. 2022 has come and the new era of Flutter templates has arrived. Please welcome the new collection of the best free templates. Here you’ll find e-commerce app templates, banking apps, weather apps, and more.
1. Hungry
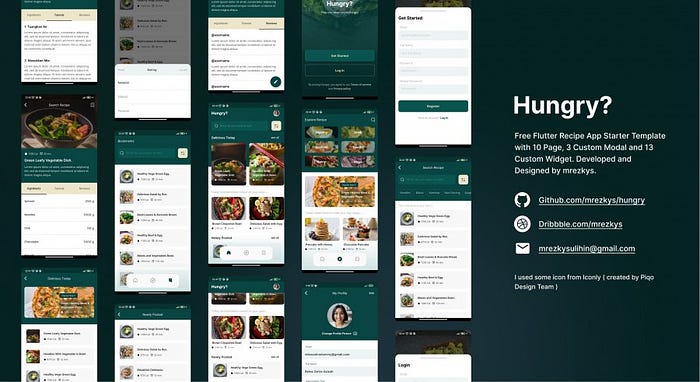
Do you know the recipe for an ideal app? At Code Market, we know that the perfect app starts with a good template. Because it keeps development time down and increases your chances of success. This is recipe app template that will definitely make you drool. It includes such screens as:
Welcome Page
Bookmarks Page
Delicious Today Page
Explore Page
Full Screen Image Page
Home Page
Newly Posted Page
Page Switcher
Profile Page
Recipe Detail Page
Search Page
And this is not the end. Number two in our menu is 3 Custom Modals. The author of this template tried his best and made this template incredibly cool. You won’t have to worry about the frontend. Just build your backend and bind it to this template. Boom — the application is ready.
Login Modal
Register Modal
Search Filter Modal
And for dessert, 13 custom widgets. Still hungry for other templates? I don’t think so.
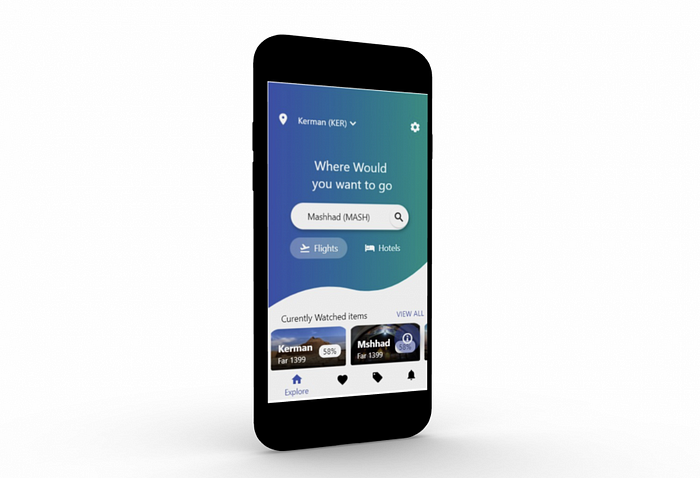
2. Travel App UI Design

UI takes a major part of the demand among app templates. This time we suggest you take a look at this awesome free travel app template. The cozy design of this app sets up a pleasant vibe. Using this template in your work you won’t spend a lot of effort, because half of the work is already done for you.
This template is easy to customize. So you can use it not only as a travel app template, but also as a blog, store, whatever comes to your mind.
3. Flutter Wishes App UI Challenge

Ugh, how often have I wanted to save up to study Flutter development, but all the money goes to beer and chips? Countless times. But thanks to templates like these, you don’t just learn how to develop using free templates to practice, you can also make an entire app to save money for your dreams.
The cute pink design is easy to customize. Moreover, this template can be easily implemented in another application, diversifying the interface with extra features.
4. Flutter Food Ordering App UI Template

If building an app were as easy as ordering a pizza… but wait, it’s really that easy if you use ready-made templates to work with. In this set you will find awesome design, minimalistic images on the splash page and a lot of screens. This template will be great for a food delivery app. Write your backend and your application is ready. Because this template already includes:
Profile Page
Search Page
Home Page
Shopping cart Page
Offers Page
Restaurant Page
5. Flutter Bank UI
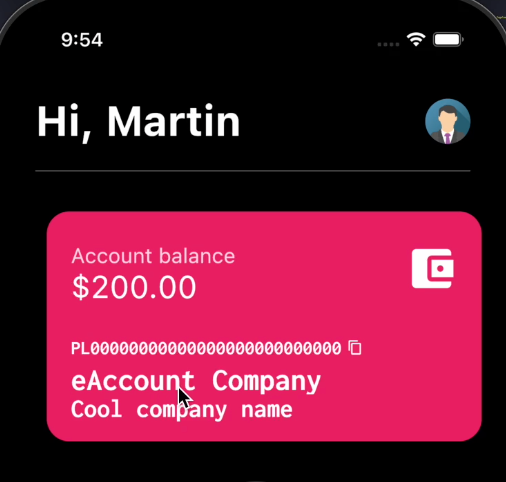
This is a banking application template with a small backend. In it you can see the balance on the card, the spending for today, a week, a month, or try to make a transaction. The minimum functions that a banking application needs and nothing unnecessary.
6. Shopping App Flutter Template

We’ve already noted that free templates can be a great way to learn how to program and build your own applications. So we suggest you take a look at this shoe store template. It has several screens. Also, such templates clearly show what you need to consider when you create an application. Feel free to customize this template. This will be a new challenge for beginner developers.
7. Flutter Weather App using API with darkmode support

Spring has sprung and I don’t know what’s better, download this template for the weather app or … might be or? Of course download this template, because it contains so many features and it just looks so good. This template includes:
Dark and Light Mode
Weather from API
Icons based on weather from API
Location is based on client IP
Scalable
Performance friendly
Today weather info
Forecast for today
3-day forecast
Dynamic temperature color change based on temperature
Null safety
8. Ecommerance Flutter UI
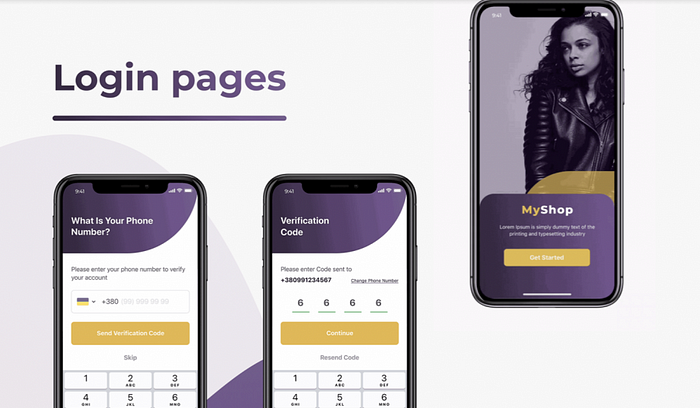
This is a great template for e-commerce. With it you can significantly reduce the time for frontend development. You can use this template to create Android and iOS apps on Flutter. The UI Kit includes all the resources you need to reuse components, it includes 20 screens, assets, icons and fonts. It is built using the latest version of Flutter with null safety support.
Moreover, it includes such features as:
Clean Code and a well structured project hierarchy
Responsive Design to any all device screen
Fully responsive UI
Best practices for UI & UX
Supports multiple Languages
Dark and light theme
Uses Animation Controllers
Easy to customize
So look at these screens. It’s easy to customize because everything is well-structured, which is a big perk for any template.
Login page with phone number confirmation
Product Page
Search page
Shopping cart
Personal information page
Favorites
Search filters page
and much more.
9. Grocery UI Template In Flutter For Android & iOS

Every person’s diet must include fruits, and every developer’s daily ration must include the grocery template. This template is User Friendly, easily customizable and includes multiple screens. This means that using this template will be helpful for your work time.
10. bwa_chat

Communication is the keystone to world domination. While using templates is key to a successful career as a developer. This chat is a great start to developing your own app. You can use it as a complete application or integrate it into another one.
11. Cryptospace

Modern design for a modern crypto wallet. Cryptocurrencies are evolving and soon will become another handy means of payment.
You can use this app template to develop a cryptocurrency wallet app or a modern banking app and more. Each user of your app will get their own wallet. The wallet is secure and every time the app is opened, authentication is required to access it. That’s why the template adds an authentication feature, which is done with a fingerprint, face authentication, or pin code. The template has the following functions: conversion of tokens with minimal commissions, replenishing the wallet, receiving or sending cryptocurrency, viewing the history of transactions. Your future app will also provide the ability to view the latest information about bitcoin and other cryptocurrencies.
12. Travel app
Traveling is always a pleasure, but doing it in comfort is even more enjoyable! There are many travel apps but they all have their disadvantages. Maybe you’ll make the perfect one? Who can tell? That’s why we offer you a travel app template. This template will save you time developing an entire app, and keep your energy, in order to make your app incredibly high quality.
13. Clima

If the clouds are over your head, it’s time to create a weather app. Let the sun always shine on you with the Clima template.
This is another handy and easy-to-use app template. You can add it to your app so your users can watch the weather. It’s suitable for apps with city events or as a standalone app.
14. Movies App
For fans of movies and TV series we have prepared this Movies App template. With this template, you’ll have your app done faster than you finished watching season two of Euphoria. Check out these great screenshots with minimalistic but cool User Friendly design. It will definitely save your work time and bring you joy if you use this template.
15. Best-Flutter-UI-Templates

The author of this template has collected three UI’s in one kit. It’s a great start for the developer. You can get three in one and create much more applications if you use parts of this template in your own job.
Also, pay close attention to the design and animation. It deserves your likes.
16. Shope — Free Flutter eCommerce Template

The e-commerce app is like a litmus test for app developers. Your portfolio should definitely include your e-commerce application, which will show the level of your coding skills. Are you just developing an e-commerce app? Well, let me help you save you time with front-end development. The author of this template made an effort and created 38 screens with a cool design, which can be quickly and easily customizable. Clean and structured code makes it stand out noticeably among other templates.
17. Fwitter — Twitter clone in flutter

All opinion leaders have Twitter feeds. But there is someone more powerful. Someone who could block a sitting president’s account if he wanted to. Become that person by developing your own Twitter app.
If you like this template, don’t forget to buy coffee for the author. He will need the coffee when he makes his copy of TikTok.
18. Flutter Smart Home UI

The history of the smart home began in 1961, when Joel and Ruth Spira created and patented a special device for continuously adjusting the light — a dimmer.
But did they know back in the 1960s that the entire house would be controlled by a single app on the phone? Moreover, the term “smart home” appeared already in 1984. They couldn’t have imagined it. However, I would like to show you a smart home control app template. Its pleasant design in itself sets you up for chilling.
With this template, you can control the air conditioner, lights and washing machine in your house without leaving your bed. Don’t you agree it’s handy? Moreover, it is even more convenient to work with this template, because it is perfectly made for all needs of developers.
19. Flutter Social App Concept

Is it Twitter? Is it Facebook? No, it’s your own social network. Using this template, you can easily set up your own communication app. 12 screens with a simple and easily customizable design will keep your work time short. Add different languages, a native VPN, and your app is ready.
20. Dashboard Reborn

Thinking of an original project, but don’t know exactly where to begin?
We advise you to take a closer look at this template. You can use it as a separate application, or add it as part of something bigger in your own project. This is a note-sharing application template. Ui is well detailed and equipped with animations. Nicely assembled code will make it easy to customize and modify it without any losses. Think about it.
21. Restaurant App UI KIT Flutter template app
I like to read reviews before going to a restaurant, or read the menu in advance. This is a very useful feature in modern reality, because you will definitely never make a mistake. This kit can be used to create applications faster to save your time. There is nothing unnecessary in this template, the code is completely clean. The template is easy to customize, you can change the objects as you require. Also, the template is created in a dark and light style, which has become the most relevant recently among all applications.
22. Swiggy Restaurant APP UI Kit template app
Another useful app that brings restaurants closer to consumers. When the Cavid-19 pandemic began, the titans of the delivery services stood up to protect psychological health and the national economy. So this Flutter template can also be your savior, with it you will save time, because you won’t have to create everything from scratch.
There are more than 20 screens in this set that you can easily customize as you want. A clean code and a detailed description will allow you to understand the structure of this template, even if you don’t have any knowledge in the field of coding.
23. Flutter Folio — mobile (ios, android), desktop (windows, macos, linux), web template app
This is not just a template, it is a template for getting experience in working with Flutter. If you are a beginner Flutter developer or designer, then this will be a great opportunity to try Flutter as a tool. This application works for all operating systems and it is very easy to install, so that any user can handle it. You can train yourself in creating a website, fill your hand, and then send the link to your friends or family.
24. Gif Finder Using GIPHY API template app
Gif is a bitmap format for graphic images. Gif finder is a convenient way to search for images. Sometimes ordinary emojis are not enough to express your emotions, and then GIFs come for help. This format for transmitting emotions, humor, or just cute pictures with cats has become so popular that now with this template, you can put the search for GIFs in your own messenger.
25. Flutter Travel App Concept
This template is appropriate for any operating system, therefore, using this template is as easy as booking a hotel room. But we remind you that to work with Flutter templates, you need some knowledge in the field of programming. In order to use this template properly, you need to have a good understanding of Dart.
26. Flutter Task Planner App Design
After long holidays or just some failures, it is always difficult to start active work. There are several motivational theories to beat procrastination, but I believe that the most effective solution is the user-friendly Task Planner App.
With this app, it’s possible to view, schedule and manage tasks as well as see projects that are being worked on. The nice color palette of this design perfectly copes with its task-it pleases the eye, but does not distract from the really important things.
Be careful, this is only a design. No backend.
27. Flutter eBook App
Useful reading (reading good books) expands a person’s horizons, enriches his inner world, makes him smarter and has a positive effect on memory. Reading books increases a person’s vocabulary, contributes to the development of clearer thinking, which allows you to formulate and express thoughts more lucidly. It also has a great effect on the sense of humor, which in the modern world is put on a par with the ability to communicate.
So, that’s why, applications for reading books are most relevant in today’s reading society. Apps like Apple Books, Amazon Kindle, or Bookmate have been on the market for a long time and show excellent results. This template is in no way less than the book giants.
Everything brilliant is quite simple. Like this template. There is nothing superfluous in the interface. Books are downloaded from public domain sources. Users of the app can read online or download books to use the app, for example, in flight. The app also has a dark mode to make it easier to read at night.
28. Flutter Tip Calculator App Source Code
If you often go to restaurants with friends, then you are probably tired of the frequent calculation of tips for a general check. It is for this case that the tip calculator template was developed. Very simple, fast, and most importantly convenient.
29. Flutter Foody bite
For gastronomic aesthetes, an application template for finding restaurants and cafes has been developed. Using the function of division into categories, you can easily find something that will suit your taste. Bon Appetit!
30. FlutterFurnitureAppUI
There is such a science as ergonomics — this is the science of convenience, about the organization of the working space for a comfortable and effective work of the employee, based on the physical and psychological characteristics of the human body. In today’s world of freelancing and distance learning, ergonomics is becoming a part of everyone’s life. After all, it is very important that your workspace meets all the requirements of this science.
Therefore, not only the furniture should be comfortable, but also the application for its purchase. This template is made extremely comfortable. With a little knowledge of the Dart language, you can easily customize this template and make a quality product for your consumer.
31. FlutterGrocery-ShoppingAppUI
Grocery stores have long migrated to the web. Instead of hauling heavy bags home, it’s much easier to order a delivery. And also just don’t create the app yourself from scratch, but use a template. Moreover, the author of this template reports that only a couple of fingers are needed for successful use.
32. Flutter login kit
Sometimes one finished piece of work can make life much easier. So I recommend you take a closer look at this login template. In a ready-made application, the login is the first thing the user sees, so you can’t make a mistake here. Trust the professionals and ready-made solutions to your problems!
33. FLUTTER TODO APP
This application is perfect for everyone who does not sit on the neck of their parents, and earns honest work. The built-in calendar lets you schedule events, set reminders, and make you more efficient day-to-day. If you are concerned about the issue of procrastination in the world, and you want to create your own convenient application for tracking tasks, then this is your choice!
34. FLUTTER NEWS MOBILE APP
News doesn’t stay fresh for long.That is why you need an app that will keep the whole world in the center of events. Whether it’s sports news, politics, or just a forecast of an impending storm. In today’s world, it is important to be one step ahead. And with this template, you will be one step ahead of your competitors! After all, while they are developing their app, your app is already working for you!
35. Flutter-movies-app
What movie should I watch tonight? It’s not on Netflix, and it’s not on HBO. So everything will be in your own streaming service!
36. E-commerce-Complete-Flutter-UI
Probably everyone has ever thought of creating their own brand or clothing store, so that they no longer spend hours looking for the perfect pair of trousers in the shopping center. But not many people succeeded. But if you are one of those lucky ones, then you probably need a stylish and user-friendly e-commerce app. I strongly recommend that you use this template to start active sales as soon as possible!
37. Flutter_ecommerce_app
Another awesome, free and very beautiful template for an ecommerce app. Bright colors are perfectly complemented by a white background, on which any thing will look even more attractive.
38. E-commerce-App-UI-Flutter
Everyone can sell products, but not everyone can do it nicely! This template is made quite original. Here everything is taken into account so as to show the product at the right angle. The main feature of this template is that the background of each product favorably emphasizes the color and texture of the product itself.
39. Flutter firebase shopping app
This is the most versatile template for e-commerce. With this template, you can sell anything from club T-shirts to car parts. The concise design does not distract with flashy colors or pictures from the products, so that the customer can easily navigate in the app. This template is for those who know what they need!
40. Flutter-Blog-App
Green in psychology today means growth, development, prosperity, stability, new beginnings. Therefore, it is perfectly suitable for the design of a blog application. Learn new things, live long and prosper.
41. Watermaniac — Flutter template
As I said, this article will be updated with new templates. And here are a couple of new products especially for you.
This template consists of Dart, as we are all made of water. And with this template, you will not forget to drink the right amount of water while you are developing your applications. If you, like me, care about the health of everyone around you and you want to be a useful person for society, then feel free to download and launch your water counting application!
42. Analog Clock Light & Dark Theme
Time flies so fast that you can’t keep track of it. But this template will help you make this process more stylish! Check it out!
'프로그래밍 > App' 카테고리의 다른 글
| 토스가 꿈꾸는 React Native 기술의 미래 (0) | 2024.03.26 |
|---|---|
| Modern Android Development in 2024 (0) | 2024.02.16 |
| [Flutter] Flutter AI 통합: 모바일 앱 재정의 (0) | 2023.11.24 |
| Flutter vs. React Native (0) | 2023.11.16 |
| [Flutter] Flutter에서 딥링킹을 구현하는 방법은 무엇입니까? (0) | 2023.11.06 |


