[python] 웹 기반 파이썬 데이터 앱 쉽게 다루는 스트림릿( Streamlit ) 간단 예제
https://www.itworld.co.kr/news/334135
파이썬 애플리케이션의 공통적인 문제는 다른 사람들과 앱을 공유할 방법이다. 개발자들은 이 문제를 해결하기 위해 웹 인터페이스를 사용해서 UI를 통해 앱 기능을 제공하는 경우가 많다. 그러나 이 방법은 애플리케이션 UI가 웹 구성요소와 자연스럽게 맞을 때 가장 효과적이다. 예를 들어 데이터 탐색 앱은 이와 같은 방식으로 작동할 수 있지만, 이상적인 상호작용을 위해서는 프론트엔드 구성요소가 자바스크립트로 작성돼 있어야 한다.
스트림릿(Streamlit)은 이와 같은 많은 문제를 동시에 해결하는 것을 목표로 하는 파이썬 라이브러리다. 개발자는 스트림릿을 사용해서 풍부한 인터랙티브 구성요소 라이브러리를 기반으로 구축된 웹 기반 프론트엔드를 갖춘 파이썬 앱을 만들 수 있다.
그렇게 만들어진 애플리케이션은 파이썬 웹 앱이 있는 어디에나 호스팅할 수 있다. 무엇보다 좋은 점은 좋은 결과를 얻기 위해 반드시 HTML, 자바스크립트 또는 CSS에 대해 알 필요는 없다는 것이다. 스트림릿의 메서드와 클래스를 사용하는 파이썬 코드를 작성하기만 하면 된다.
간단한 스트림릿 예제
스트림릿 프로그램은 선언적 스타일로 작성된다. 객체는 코드에서 선언된 순서대로 웹 페이지에 나타난다. 구성요소와의 상호작용이 발생할 때마다 프로그램이 위에서부터 아래로 다시 실행되면서 웹 페이지를 다시 로드해 변경 사항을 반영한다.
다음과 같은 간단한 스트림릿 앱 예제를 살펴보자.
import streamlit as st
st.title("Take input from the user")
user_input = st.text_input("Say something:")
if user_input:
st.write("You said:", user_input)
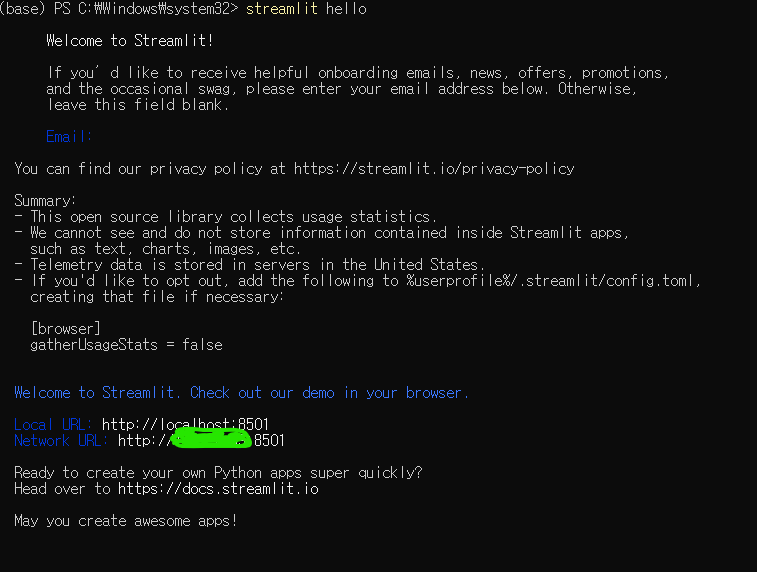
스트림릿으로 이 코드를 실행할 경우(streamlit run 명령 사용) 결과는 다음과 같다.
- 'Take input from the user'라는 제목의 웹페이지가 나타난다.
- 그 아래에 'Say something:'이라는 레이블이 붙은 텍스트 상자가 나타난다.
- 사용자가 이 텍스트 상자에 뭔가를 입력하고 Enter를 누르면 'You said:'라는 레이블의 텍스트 상자 아래에 사용자가 입력한 내용이 표시된다.
이러한 HTML 위젯과 모든 위젯 동작은 스트림릿에 의해 자동으로 생성되고 관리된다. 여기에는 앱 상태가 포함된다(예를 들어 user_input 상자에서 if 문은 사용자가 뭔가를 입력할 때만 실행됨).
스트림릿에서는 아래 예제보다 훨씬 더 많은 HTML 구성요소를 사용할 수 있다. 라텍스(LaTex) 형식 텍스트, 보케(Bokeh) 차트, 카메라 입력, 그 외에도 많은 구성요소가 네이티브로 제공된다.
더 복잡한 스트림릿 예제
더 복잡한 스트림릿 애플리케이션으로는 스트림릿 문서의 예제가 있다. 이 앱은 시간별로 그룹화된 맨해튼의 우버 승차 및 하차 지점 일반 데이터 집합을 로드한 다음 막대형 차트에 시간을 표시하고 인터랙티브 지도에 위치를 표시한다.
전체 프로그램 길이는 약 30줄에 불과하다. 워낙 짧아서 복사한 다음 파일에 붙여넣고 직접 실행할 수 있다. 스트림릿이 다양한 작업을 수행하는 방식을 보여주는 용도로도 좋은 앱이다.
스트림릿 앱의 데이터
스트림릿은 데이터 소스를 쉽게 다루기 위한 많은 네이티브 동작을 제공하며 데이터 로드 및 작업을 위한 주 형식으로 데이터프레임을 사용한다.
다른 파이썬 프로젝트에서 사용할 수 있는 모든 소스에서 데이터를 로드할 수 있으며, 이 과정을 돕기 위한 편의 기능도 제공된다. 예를 들어 이전 섹션에서 다룬 데이터 시각화 앱은 판다스(Pandas)를 사용해 원격 URL에서 CSV 파일을 로드하고 데이터프레임으로 변환한다. 데이터 로드와 형식 설정은 편리하지만 특히 네트워크 연결을 통해 로드하는 경우 속도가 느리고 많은 시간이 걸릴 수 있다. 또한 이 프로그램은 사용자가 동작을 수행한 후 매번 다시 로드된다.
스트림릿은 이 문제를 해소하기 위해 load_data() 함수를 래핑하는 데 사용되는 @st.cache_data 데코레이터를 제공한다. 또한 @st.cache_data는 애플리케이션이 여러 번 다시 로드되는 사이 데이터를 캐시하므로 처음 실행할 때만 로드된다.
스트림릿 앱의 상태 관리
스트림릿은 설계상 각 사용자 상호작용마다 애플리케이션이 강제로 다시 로드되므로 스트림릿 앱에서 지속적인 상태를 유지하기가 간단치 않을 수 있다. 텍스트 박스의 데이터가 실행 간 상태를 어떻게 처리하는지는 앞에서 살펴봤다. 개별 컨트롤의 상태와는 별개로 상태를 만들고 관리하려면 스트림릿의 내장된 session_state 객체를 사용해야 한다.
streamlit.session_state는 여러 실행 간에 지속되는 키-값 저장소다(실질적으로 사전). 스트림릿 프로그램이 처음 시작될 때 이 저장소는 빈 상태이므로 액세스하기 전에 키가 있는지 여부를 테스트해야 한다.
import streamlit as st
# create the key "sayings" if it doesn't exist
if 'sayings' not in st.session_state:
st.session_state['sayings'] = []
# for convenience, make a reference
sayings = st.session_state['sayings']
st.title("Take input from the user")
user_input = st.text_input("Say something:")
if sayings:
# display "sayings" if it has inputs from previous runs
st.write("You previously said:", sayings)
if user_input:
# add to "sayings" if we get an input
sayings.append(user_input)
st.write("You said:", user_input)
참고로 session_state에 저장되는 모든 데이터는 해당 애플리케이션을 실행하는 스트림릿 서버의 수명 동안만 지속된다. 서버가 멈추면 데이터는 손실된다. 더 적극적으로 지속되는 데이터를 원한다면 데이터베이스 또는 레디스와 같은 인메모리 캐시 등의 솔루션이 필요하다.
스트림릿 앱을 위한 데이터 위젯
지금까지 스트림릿 페이지에서 구현 가능한 다양한 요소로 간단한 텍스트 레이블 또는 HTML 컨트롤부터 지도, 차트, 오디오/비디오 재생과 같은 더 정교한 요소, 그리고 채팅 상자와 같은 고급 상호작용(예를 들어 LLM과의 상호작용 용도)까지 살펴봤다.
데이터 표시 또는 상호작용을 위한 스트림릿 컨트롤은 가장 일반적인 사용 사례를 위한 데이터 렌더링을 처리하도록 이미 사전 설정돼 있다. 예를 들어 스트림릿 웹 위젯은 데이터프레임을 소스로 사용할 수 있고 데이터프레임을 적절한 열 레이블과 함께 자동으로 표시하므로 수동으로 이를 추가할 필요가 없다.
스트림릿에는 폭넓은 일반적인 데이터 위젯 라이브러리가 기본적으로 포함된다. 사용자 커뮤니티에는 더 많은 구성요소가 만들어져 공유되며, 간단한 pip install을 통해 사용할 수 있다.
스트림릿 앱 배포
스트림릿 애플리케이션은 본질적으로 파이썬 웹 애플리케이션이므로 네트워크로 연결된 파이썬 앱과 거의 같은 방식으로 배포할 수 있다. 빠르고 간편한 방법은 컴퓨터에서 앱을 실행하고 할당된 포트를 통해 앱에 대한 액세스 권한을 제공하는 것이다.
고급 배포 역시 다른 파이썬 웹 앱과 동일한 패턴을 따른다. 즉, 도커, 쿠버네티스 또는 다양한 일반적인 클라우드 서비스를 사용하는 것이다. AWS와 마이크로소프트 애저의 스노우플레이크 사용자는 스노우플레이크 데이터 저장소를 기반으로 하는 스트림릿 앱을 배포할 수도 있다. 마지막으로, 스트림릿은 자체적인 커뮤니티 클라우드(Community Cloud) 호스팅 서비스를 제공한다. 다만 이는 스트림릿 앱을 위한 편의 기능일 뿐 필수 항목은 아니다.