
반응형
(사용자를) 생각하게 하지 마!
 |
|
============================================================================
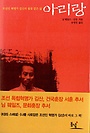
아리랑
 |
|
도서출판 동녘은 광복 60주년의 상징적인 의미와 건국훈장 애국장이 추서된 김산(장지락) 선생의 뜨거운 조국애가 담겨있던 [아리랑]을 보다 많은 사람들이 쉽게 다가갈 수 있도록 개정2판이 출간된 1993년 이후 12년만에 판형과 본문 레이아웃을 전면수정한 개정3판을 8,15 광복절에 맞춰 내놓았다.
이번 개정3판에서는 십여 년이 지난 구간 도서를 현재에 맞게 보기 편하고 읽기 쉬운 장정으로 탈바꿈하고자 하였다. 이를 위해 판형을 신국판에서 손에 들기 편한 사륙판으로 바꾸고 본문 레이아웃을 이전의 활판 글꼴 형태에서 현재 널리 읽히고 있는 글꼴과 시원시원한 행으로 전면 재편집하였다.
특히 표지에 이전판에는 없었던 27세 때 감옥에서 찍은 김산의 강인한 모습을 담아 독자에게 김산의 실제 이미지를 알리고자 했고 내용면에서는 이전판의 대화 내용을 현대적 감각에 맞춰 다듬었고 중국 인명과 지명을 한자음에서 중국어 표기 방식으로 수정하였다(예: 연안-옌안, 모택동-마오쩌둥). 마지막으로 서슬 퍼런 군부독재 시절에 이 책을 번역하면서 조우화라는 가명을 쓸 수밖에 없었던 역자 이름을 되찾아 주는 의미에서 본명인 송영인으로 표기하였다.
이번 개정을 통해[아리랑]이 고등학생 이상이면 누구든지 쉽게 읽을 수 있는 책이자 김산의 치열했던 삶과 그 의미를 다시금 되새겨 보는 계기가 되고 ‘나도 김산처럼 치열하게 살고 싶은’ 열정을 한국인의 한 사람으로 간직하길 바라는 마음 간절하다.
[아리랑]연혁
1983년 말, 노동운동가로 은신중이던 친구 송영인(당시 가명 조우화)이 1941년 미국에서 출간된 [Song of Arriran]을 번역하였고 서슬 퍼런 국가보안법을 무릅쓰고 1984년 3월 출간했다. 출간 3개월 후 이건복 사장이 기관에 불려갔고, [아리랑]은 용공서적으로 분류되고 판매금지와 지형 반납 결정이 내려졌다. 또한 이후 수년간 동녘출판사는 수색과 압수를 수없이 치러야 했다.
1990년 7월 이영희 교수를 통해 님 웨일즈의 생존을 확인한 이건복 사장은 즉각 님 웨일즈에게 연락을 취하고 그녀에게 시대적 상황으로 인해 출판 사실을 알리지 못했던 점에 양해를 구했다. 동녘출판사는 님 웨일즈에게 우선 사례비로 1천 달러를 송금했고 이후 님 웨일즈와 정식으로 출판 계약을 하였다. 님 웨일즈는 1990년 7월 동녘출판사에 [아리랑]을 집필한 이래 처음으로 원고료를 받고 감격했다는 내용의 편지를 보내왔다.
1992년 님 웨일즈의 육필 서문과 김산의 사진, 이영희 교수 추천사, 조지 토튼의 해설을 추가한 개정판을 펴냈다.
1993년 개정2판에서는 저자 이름에 님 웨일즈와 김산을 나란히 표기하였고 표지를 양장에서 무선철로 바꿨다.
2005년 8월 15일, 개정3판 출간하였다.
[목 차]
추천의 글 | 리영희
한국어판 서문 | 님 웨일즈
서장 | 님 웨일즈
1. 회상
2. 조국에서의 어린 시절
3. 독립선언
4.도쿄 유학 시절
5. 압록강을 건너서
6. 상하이, 망명자의 어머니
7. 때를 기다리는 사람들
8. 걸출한 테러리스트: 김약산과 오성륜
9. 결코 결혼하지 않으리라
10. 톨스토이에서 마르크스로
11. 중국 '대혁명' 에 참가하여
12. 광등코뮌
13. 하이루펑에서의 삶과 죽음
14. 상하이에서의 재회
15. 위험한 생각
16. 다시 만주로
17. 위대한 첫사랑
18. 아리랑 고개를 넘다
19. 당내투쟁과 개인적 투쟁
20. 살인, 자살, 절망
21. 다시 대중운동으로
22. 다시 일본에 잡히다
23. 두 여인
24. 항일전선
25. 패배하더라도 좌절하지 않는 자만이
기록을 끝내며 | 님 웨일즈
해설 | 조지 토튼
역자 후기
.
반응형
'생활의 발견 > Books' 카테고리의 다른 글
| [도서구매] 스토리텔링의 기술 (0) | 2016.05.24 |
|---|---|
| [도서구매] 일 잘하는 사람의 정리습관 (0) | 2016.04.22 |
| [도서구매] 생각을 읽는다 (1) | 2016.03.29 |
| [도서구매] 글쓰기 정석 (1) | 2016.02.24 |
| [도서구매] 오리지널스 : 어떻게 순응하지 않는 사람들이 세상을 움직이는가 (0) | 2016.02.23 |
