created with
Visual Studio Code, also known as VS Code, is a free and open-source code editor developed by Microsoft that has taken the developer world by storm. With its sleek interface, extensive customization options, and a vast array of extensions, VS Code has quickly become the go-to choice for developers looking to streamline their workflow and boost productivity. Whether you’re a seasoned developer or just starting out, VS Code is a tool you won’t want to miss.
Topics which I will be talking about
- My setting Config
- My Theme
- My Extensions
- Surprise
My Setting Config
VS Code settings JSON config includes a variety of configurations to customize your coding experience.
Tip:- You can customize your settings.json file by typing Ctrl + Shift + P, and then typing ‘User Settings’.
{
  "workbench.colorTheme": "Vim Deep Dark", // My Theme
  "workbench.iconTheme": "material-icon-theme", // My Icon Theme
  "editor.fontFamily": "Fira Code", // My Font
  "editor.fontSize": 19, // Font size
  "editor.minimap.enabled": false, // disabled minimap
  "editor.fontLigatures": true, // enabled ligatures
  "editor.formatOnPaste": true, // text will format on pasting the code
  "editor.formatOnSave": true, // text will format if you hit ctrl + S
  "editor.defaultFormatter": "esbenp.prettier-vscode", // formatter
  "terminal.integrated.fontFamily": "MesloLGS Nerd Font", // terminal font to use icons
  "debug.terminal.clearBeforeReusing": true,// clears your debug terminal before using
  "terminal.integrated.fontSize": 19, // terminal font size
}
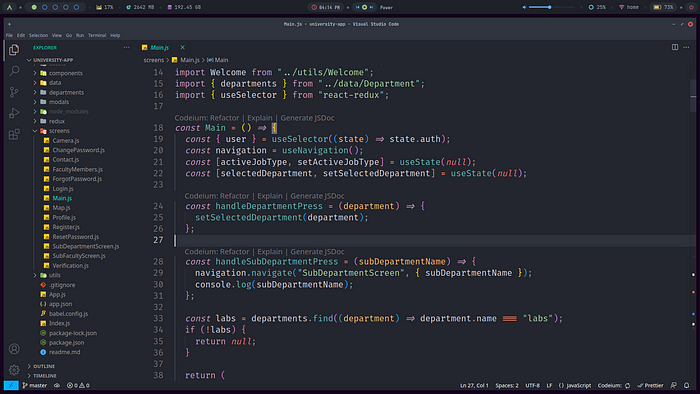
How it looks like in VS code
My Theme
Well, if you have read my configuration, then you should already know the name of the theme I am using
Vim Theme
Demo
Vim theme
Apart from this theme, I like to use Andromeda Mariana — Italic
Second Theme demo
Andromeda Mariana
My Extensions
Visual Studio Code (VS Code) is a popular code editor that offers a range of extensions to enhance its functionality. VS Code extensions are add-ons that provide additional features and capabilities to the editor, such as new language support, code snippets, syntax highlighting, debugging tools, and more.
Prisma
Prisma
Only for DATABASE USERS :- Adds syntax highlighting, formatting, auto-completion, jump-to-definition and linting for .prisma files.
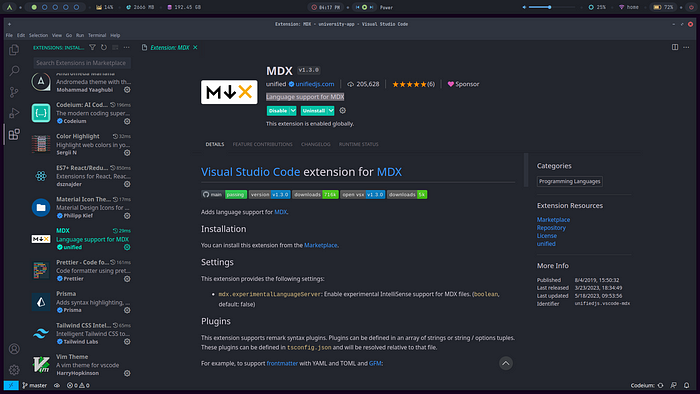
MDX
MDX
Language support for MDX
Prettier
Prettier- Code formatter
Prettier is an opinionated code formatter. It enforces a consistent style by parsing your code and re-printing it with its own rules that take the maximum line length into account, wrapping code when necessary.
Material Icon Theme
Material Icon Theme
Material Design Icons for Visual Studio Code
ES7 Support
ES7
Extensions for React, React-Native and Redux in JS/TS with ES7+ syntax. Customizable. Built-in integration with prettier.
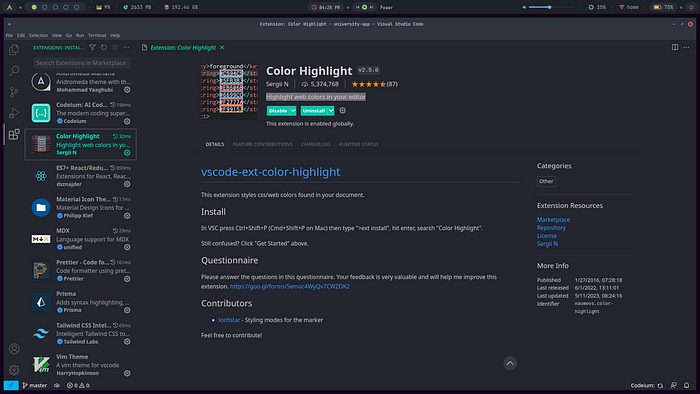
Color Highlight
Color Highlighter
This extension styles css/web colors found in your document.
Github Copilot
Copilot
GitHub Copilot provides autocomplete-style suggestions from an AI pair programmer as you code. You can receive suggestions from GitHub Copilot either by starting to write the code you want to use, or by writing a natural language comment describing what you want the code to do.
Surprise
“Breaking the Norm: Why I swapped VS Code for Vim and never looked back!”
vim
The File Explorer structure that you are seeing is a Tree View lua plugin which is fabulous, and I am able to code faster than ever using shortcuts.